Easy and Magical Disney Countdown Calendar You Can Make Yourself In 5 Easy Steps
Headed to Walt Disney World, Disneyland, or shipping out on a Disney Cruise? Kick off the anticipation with a super easy DIY Disney Countdown Calendar.
Do you have any vacation plans this summer? We are going to Walt Disney World (yay!) because my daughter will be just below the 3-year-old mark and still free (double yay!).
It's not a trip we take every year. In fact, it's been 4 years since we last went to Disney. So needless to say, we like to make it a special event. This year, we are kicking off the anticipation with a Disney Countdown Calendar.
Is a Disney vacation on your calendar in the future?
If so, you'll love this simple and stylish countdown calendar to hang on the walls.
Make sure you check out this list of events at Walt Disney World as you are planning!
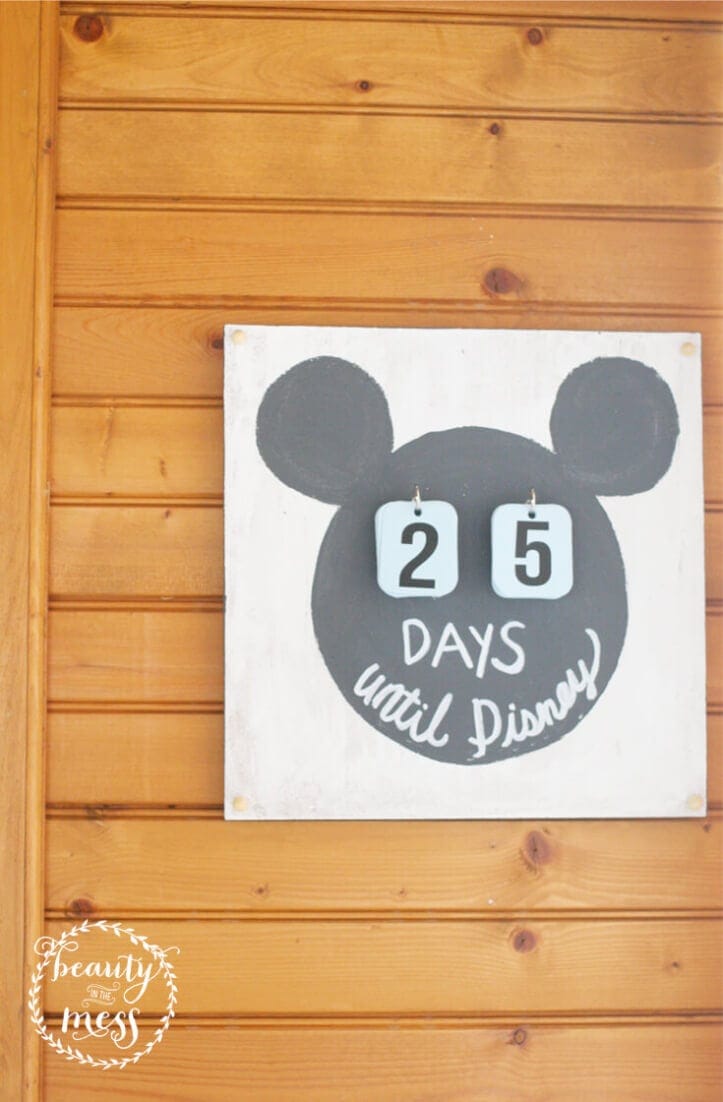
DIY Disney Countdown Calendar
Get ready to sprinkle some Disney magic into your everyday routine!
Our DIY Disney Countdown Calendar is the ultimate way to bring the enchantment of Disney right into your home. As the days draw closer to your next Disney adventure, watch the excitement build with this easy-to-make countdown calendar.
Simply change the numbers each day and let the anticipation soar!
Supplies
- 2 – 12 x 12 Cork Tiles
- White and Black Craft Paint
- Foam Paint Brushes
- Pencil
- Salad Plate and Cup
- 4 Push pins
- Cardstock
- Numbers 1-9 Printable
- Printer and Ink
- Paper Trimmer (or Scissors)
- Hole Punch
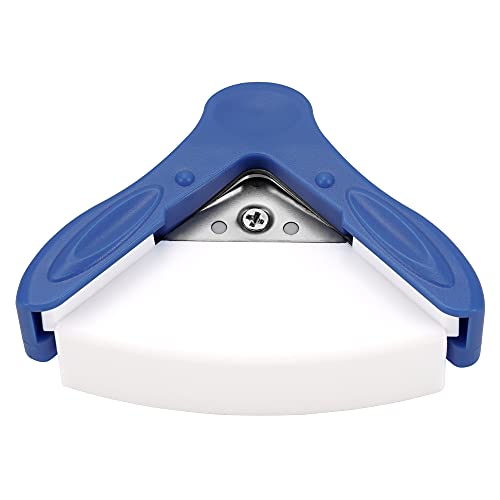
- Corner Rounder
- 2 Cup Hooks
- Chalk Marker
Disney Countdown Calendar Instructions
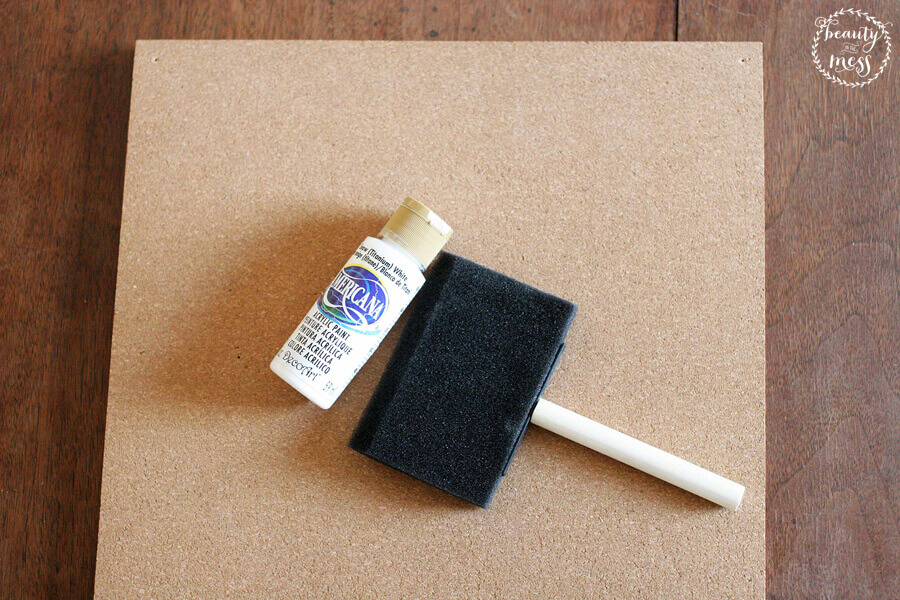
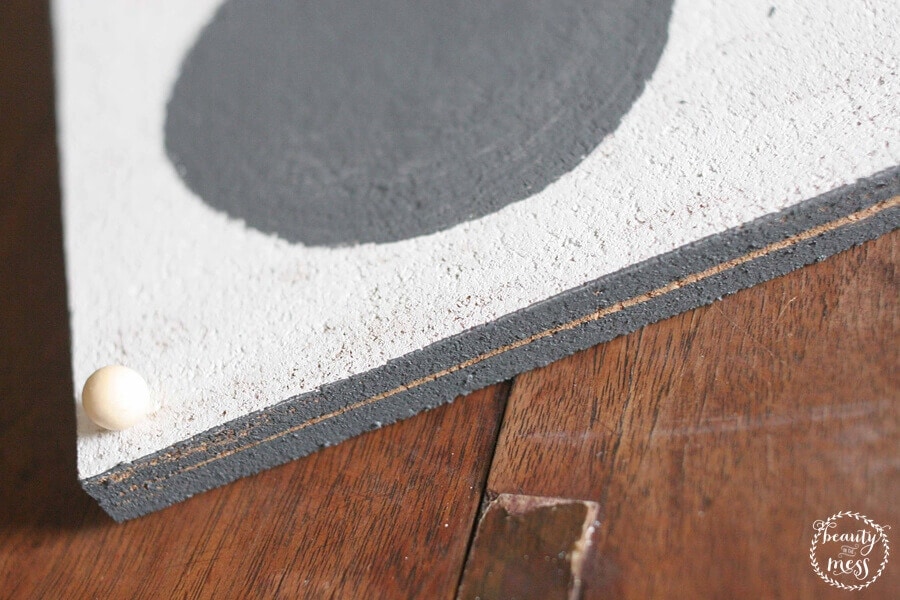
- Paint a 12 x 12 cork tile with a foam brush and white paint.
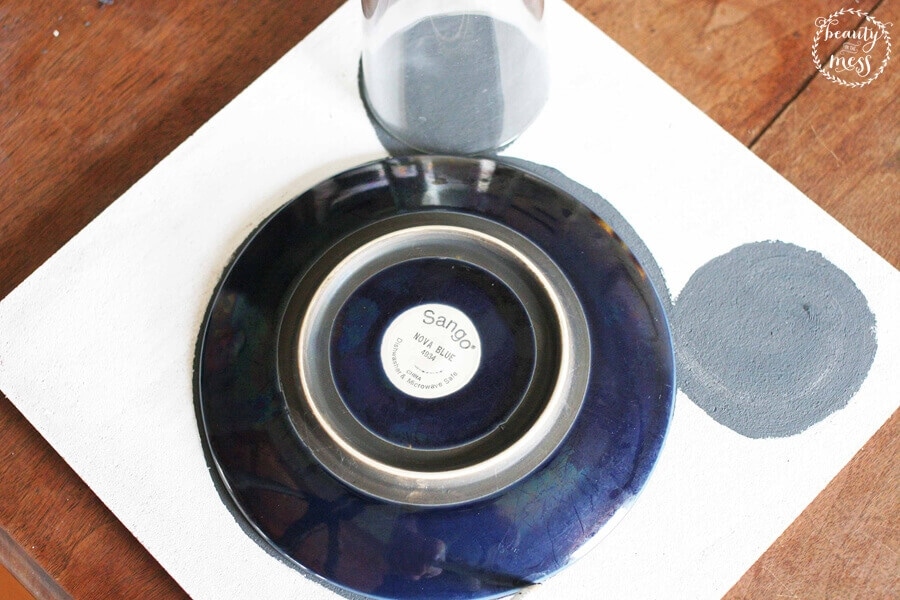
- Once the white paint is dry, use a salad plate and cup to mark out — in pencil — Mickey's head and ears. Next, fill in the pencil marks with black paint, using another foam brush.
- Stack a second 12 x 12 cork tile underneath the first tile, and attach them with a decorative pushpin in each corner. After this step, I added a coat of black paint around the edges.
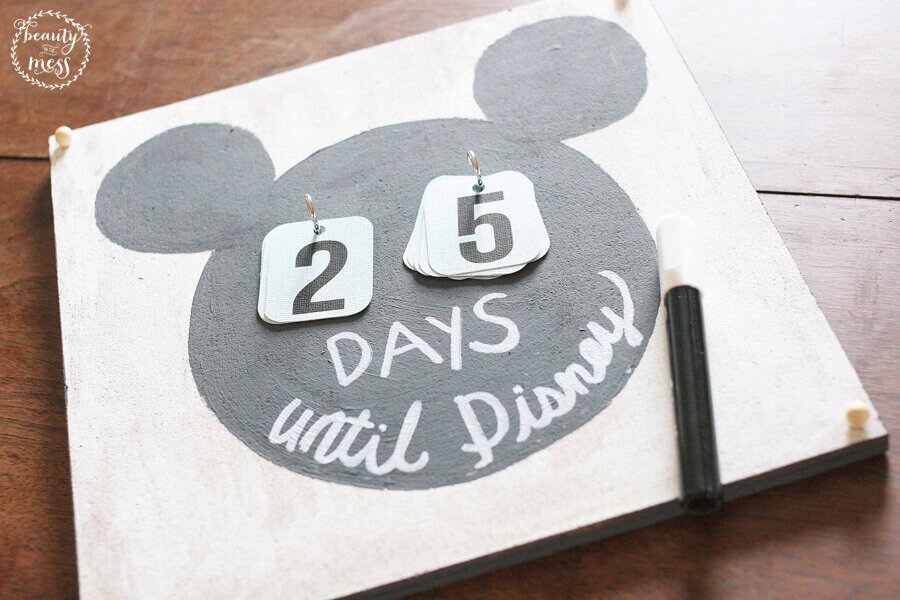
- While the paint is drying, cut out the date tags. Print two copies of the Numbers 1-9 Printable on any color cardstock (grab those below). I chose a blue cardstock to match the room in which the Disney Countdown was going to hang.
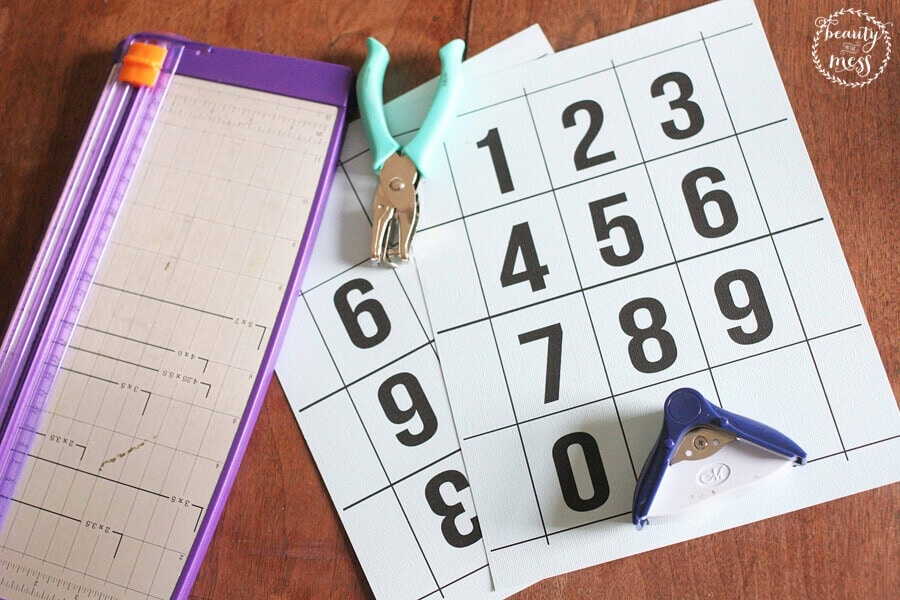
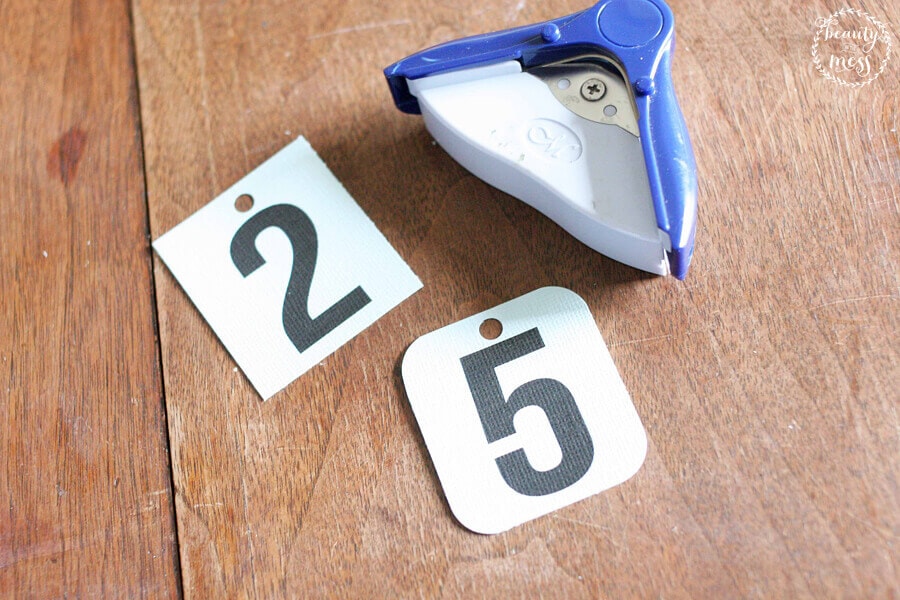
- Cut out each number with a paper trimmer or scissors. Then use a hole punch and corner rounder to turn the numbers into hanging tags.
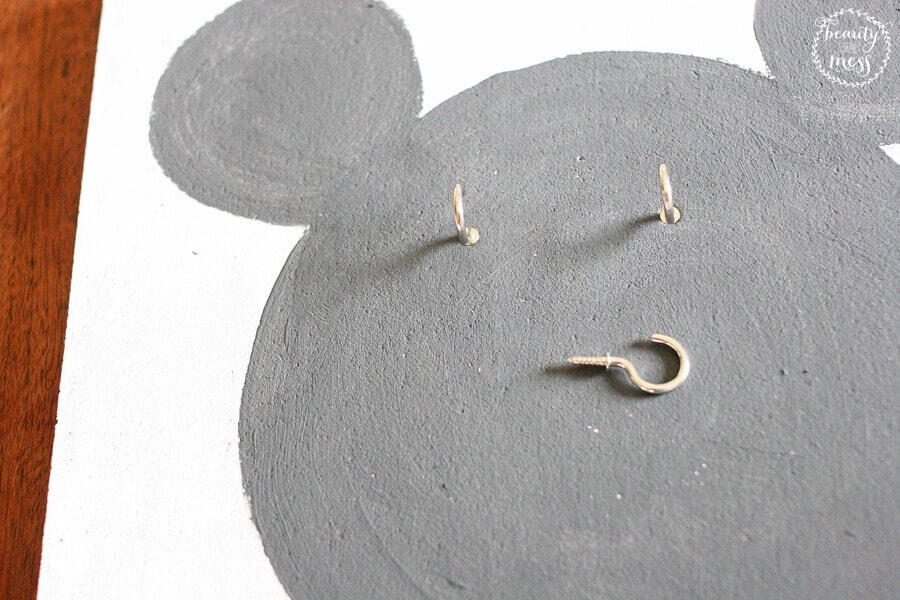
- Once the black paint is dry, screw two cup hooks into the cork. Hang the tags in order to determine where the words should be written.
- Use a chalk marker to write “Days Until Disney.” Don't stress about perfection, you can always paint back over the chalk marker with black to fix an error.
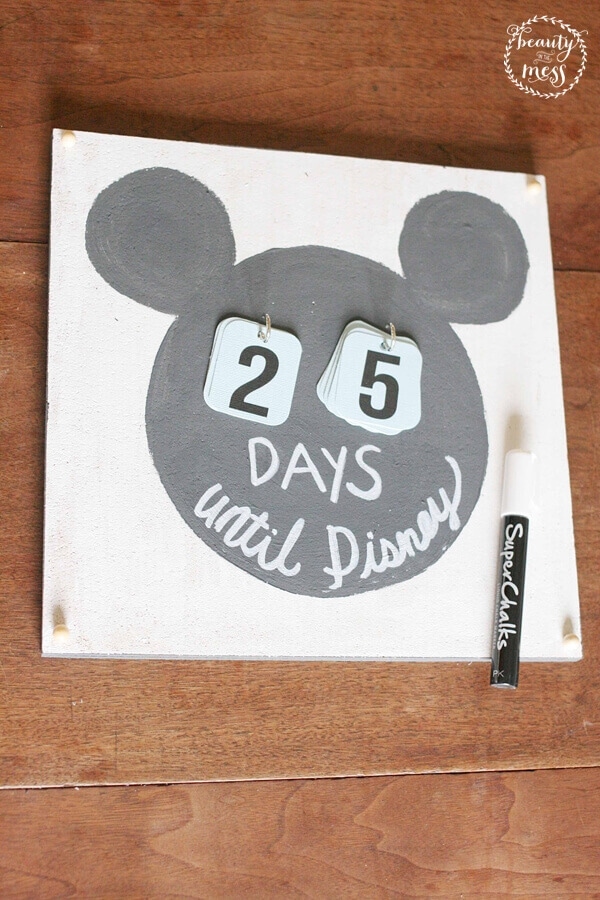
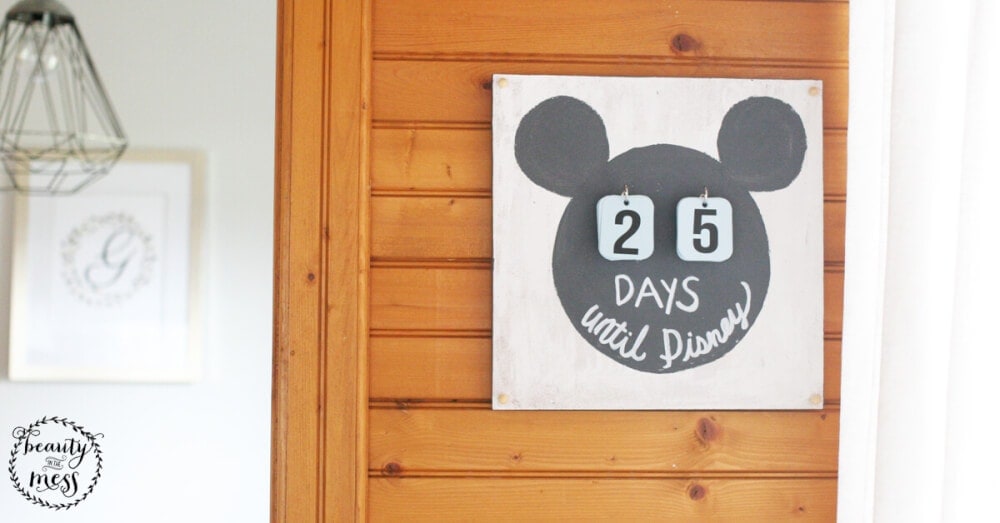
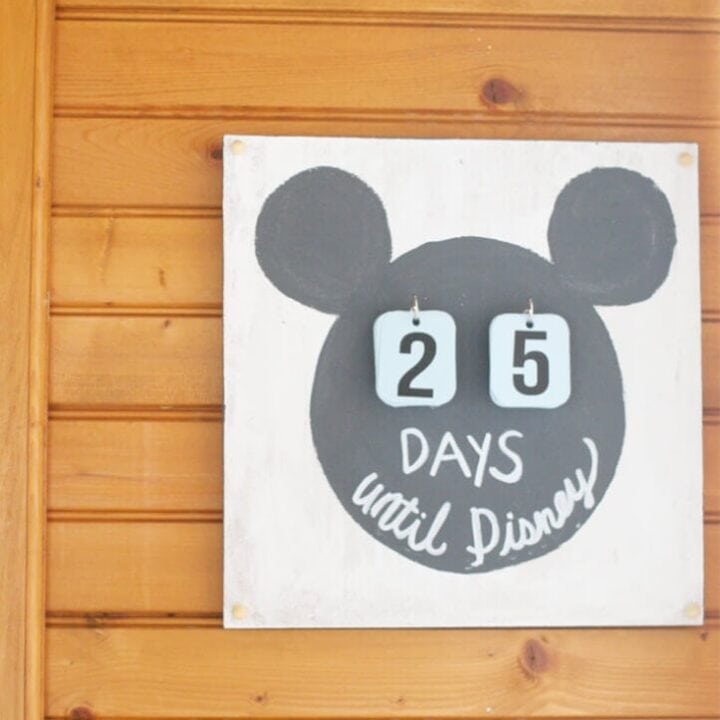
- Finally, hang it on the wall! You can use command strips or a single nail to hang the Disney Countdown. It's very lightweight, so it's simple to hang.
Now for the hard part. Waiting for your Disney trip!

Magical Countdown to Disney Calendar You Can Make Yourself
DIY Disney Countdown Calendar
Headed to Disney? Kick off the anticipation with this Super Easy DIY Disney Countdown Calendar.
Materials
- 2 12 x 12 Cork Tiles
- White and Black Craft Paint
- Foam Paint Brushes
- Pencil
- Salad Plate and Cup
- 4 Push pins
- Cardstock
- Numbers 1-9 Printable
- 2 Cup Hooks
- Chalk Marker
Tools
- Printer and Ink
- Paper Trimmer (or Scissors)
- Hole Punch
- Corner Rounder
Instructions
- Paint a 12 x 12 cork tile with a foam brush and white paint.
- Once the white paint is dry, use a salad plate and cup to mark out -- in pencil -- Mickey's head and ears. Next, fill in the pencil marks with black paint, using another foam brush.
- Stack a second 12 x 12 cork tile underneath the first tile, and attach them with a decorative pushpin in each corner. After this step, I added a coat of black paint around the edges.
- While the paint is drying, cut out the date tags. Print two copies of the Numbers 1-9 Printable on any color cardstock.
- Cut out each number with a paper trimmer or scissors. Then use a hole punch and corner rounder to turn the numbers into hanging tags.
- Once the black paint is dry, screw two cup hooks into the cork. Hang the tags in order to determine where the words should be written.
- Use a chalk marker to write "Days Until Disney." Don't stress about perfection, you can always paint back over the chalk marker with black to fix an error.
- Finally, hang it on the wall! You can use command strips or a single nail to hang the Disney Countdown. It's very lightweight, so it's simple to hang.
Recommended Products
As an Amazon Associate and member of other affiliate programs, I earn from qualifying purchases.
-
 Chalk Markers - 8 Vibrant, Erasable, Non-Toxic, Water-Based, Reversible Tips, For Kids & Adults for Glass or Chalkboard Markers for Businesses, Restaurants, Liquid Chalk Markers (Vibrant 6mm)
 -
 Biaungdo 100 Pcs 1/2" Ceiling Cups Hooks Screw Hooks Ceiling Cup Hooks Self-Tapping Screws Hooks Gold
 -
 MyLifeUNIT Corner Rounder Punch 5 mm, Blue
 -
 Single Hole Punch Metal Purple, 1/4” Hole Puncher with Soft Grip Handles for Paper and Crafts
 -
 Fiskars SureCut™ Deluxe Craft Paper Trimmer - 12” Cut Length - Craft Paper Cutter with Grid Lines
 -
 60 Sheets Textured Colorful Card Stock 28 Multicolor Cardstock
 -
 ROYAL BRUSH RFOMW-4P Foam Brush, 4-Count
 -
 ODOME Cork Board Tiles 12”X 12” – 1/2” Thick Cork Board – Bulletin Board
 -
 Craft Smart Acrylic Paint Sets- Black & White Acrylic Paint Value Set by Craft Smart.
What is your favorite way to countdown to your Disney vacation?
About the author

My name is Lora Green and I blog at Craftivity Designs, where I document how we are creating our home. I believe that a home is about much more than design and decor – it should tell the story of a family. Our home must fit the needs of two small kids, a work-at-home mom, and a youth pastor dad. I want it to be a beautiful space, but it should be functional and meaningful, too. If you are trying to meld function and beauty, join me over at Craftivity Designs to share in this journey of creating our home.


One Comment