3 Easy to Make Painted Wood Slice Pumpkins Using Your Cricut
Need something for the table this Thanksgiving? These thankful, grateful, blessed wood slice pumpkins using the Cricut Joy will be perfect as decorations or as place cards.
What do you think of when you think of fall?
For me, it's falling leaves, cozy socks, cooler weather, and of course, pumpkins.
I love these little wooden pumpkins! They are perfect for placeholders on a table, a take-home gift from a conference, or even a gift tag. The perfect little pumpkin craft using your Cricut!
How to Make DIY Wood Slice Pumpkins Craft

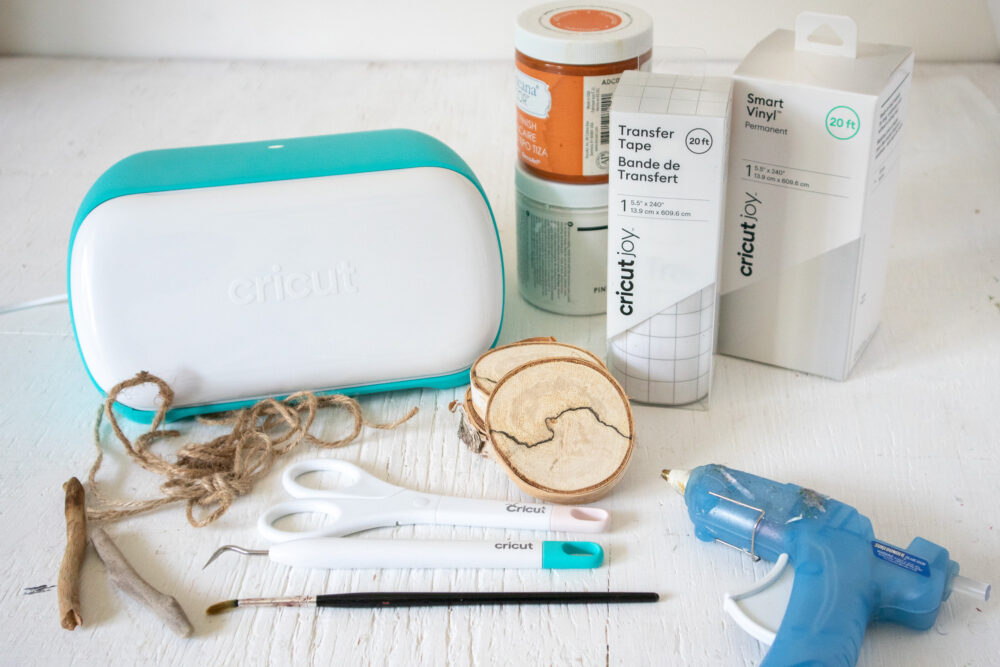
Materials Needed for Painted Wood Slice Pumpkins
- Set of 3 birch wood slices, 2.25” diameter x ⅜” thick
- Americana Decor Chalky Finish in Heritage and Everlasting
- Paintbrush
- Twine
- Tree branch cut into 3 pieces measuring 1” long
- Faux pumpkin leaves, small
- Hot glue gun and clear glue sticks
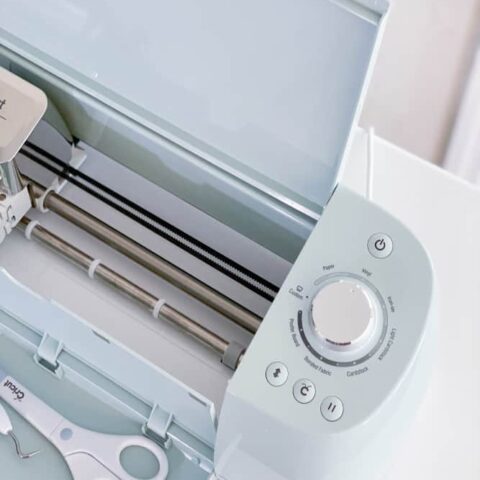
- Cricut Joy
- Smart Vinyl, Permanent in white
- Weeder
- Scissors
- Cricut transfer tape
Instructions:
- Gather supplies.
Painting the Wood Slices
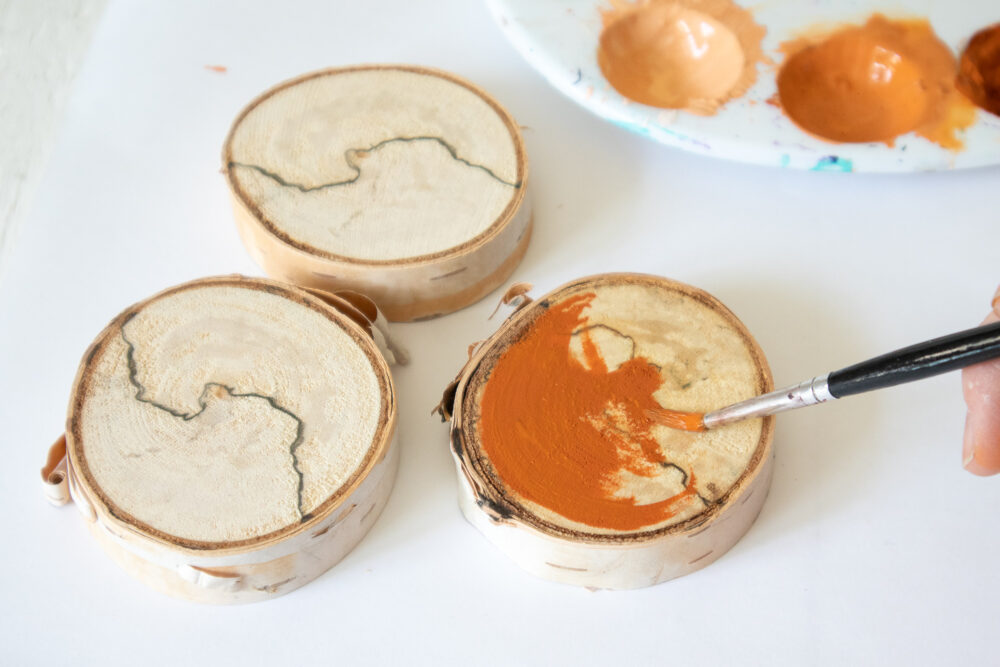
- Paint both sides of one wood slice in Heritage.
- Mix equal parts Heritage with Everlasting and paint both sides of another wood slice.
- Mix 1 part Heritage with 3 parts Everlasting and paint both sides of the third wood slice.
- Ensure paint dries fully before proceeding.
Uploading the SVG Pattern
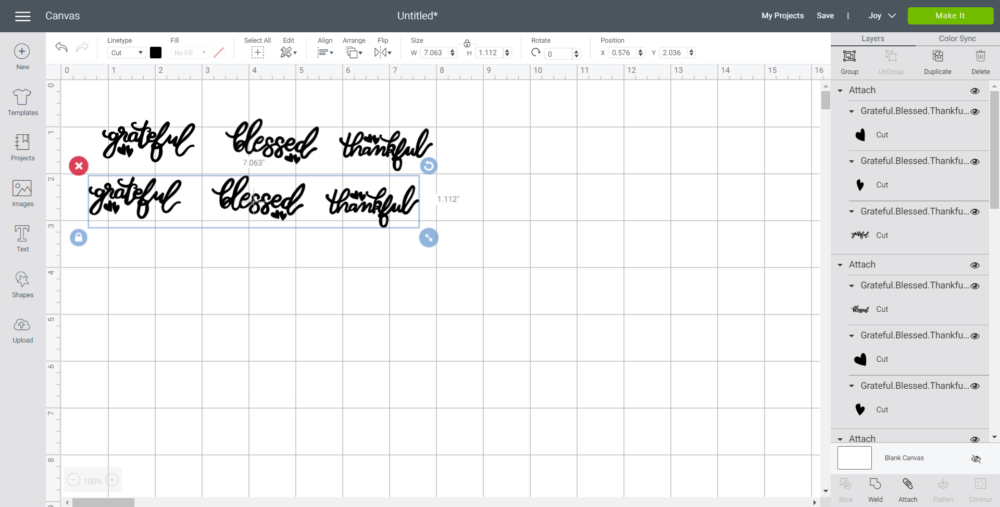
- Upload the Blessed/Grateful/Thankful SVG File into Design Space.
- With the image highlighted, click on ungroup to separate the words.
- Adjust word sizes to fit your wood slices accordingly or maintain size (2” wide) as provided.
- Highlight one word at a time along with the heart shapes and click on “Attach”.
- Duplicate each word to have a total of 6 for cutting (two per wood slice pumpkin).
Cutting the Vinyl

- Ensure the machine is set to Cricut Joy and select “Make It” in Design Space.
- Choose “Without Mat” as the option for cutting when using Smart Vinyl.
- Set material type to Smart Vinyl.
- Follow prompts for loading the mat into the Cricut Joy and cutting the Smart Vinyl. When prompted, unload the vinyl from the cutting machine.
Applying the Vinyl to the Wood Slices
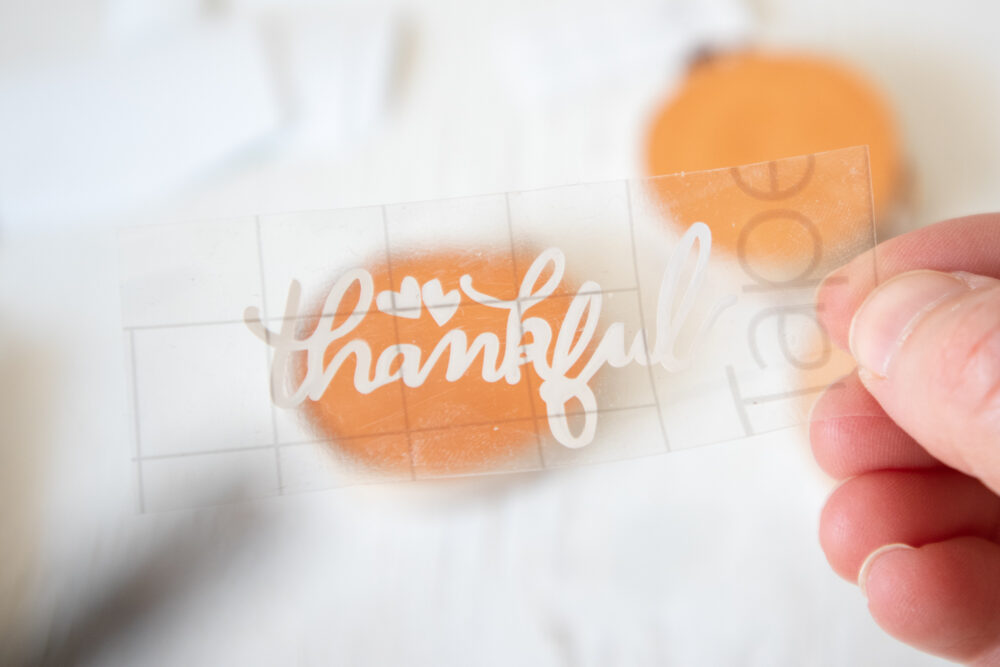
- Cut around each word with a pair of scissors.
- Using the weeding tool, peel away the excess vinyl around the word and discard.
- Cut a piece of transfer tape a bit larger than the size of the word.
- Peel away the transfer tape backing and place the transfer tape over top of the cut image. Gently rub the vinyl to help it stick to the transfer tape.
- Peel away the vinyl backing and place the image onto one side of the wood slice. Gently rub the vinyl to help it stick to the wood slice. You can use a Cricut scraper tool for this.
- Carefully and slowly peel away the transfer tape.
- Repeat steps 15-19 for the other wood slice pumpkins and for the backside of each pumpkin.
Assembling the Wood Slice Pumpkins

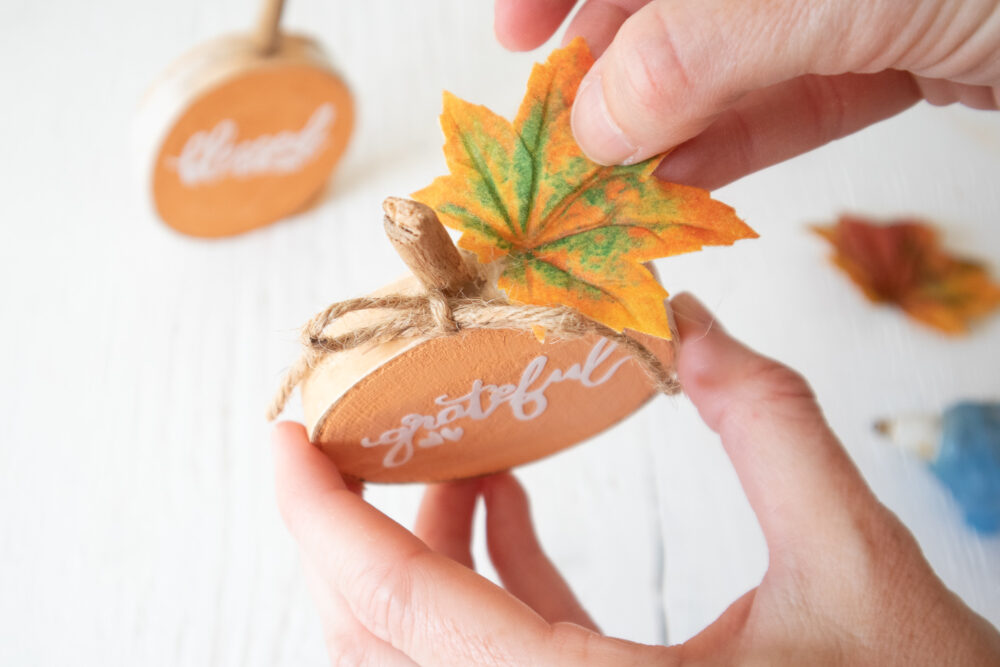
- Cut a tree branch into 3 pieces each measuring about 1” long.
- With a hot glue gun, glue the one end of the branch to the top of the pumpkin. Hold until glue sets and the branch is secure.
- Cut a piece of twine about 2” long and tie it into a bow. Glue the bow to the tree branch.
- Glue the faux leaf to the top of the wood slice pumpkin next to the branch.
More Cricut Crafts
- 17 Cute and Easy to Make Valentine’s Day Cricut Crafts
- Adorable Mini Potted Paper Cactus Craft Made with Cricut
- Colorful DIY Wood Slice Garden Markers with Cricut Joy in 7 Steps
- Easy DIY Be Mer-Mazing Tote Bag Using Cricut EasyPress 2
- What Can I Do With A Cricut Explore Air 2?
- Easy Glitter Snowflake Ornament with Silhouette CAMEO
- 20 Easy DIY Mickey and Minnie Ears for Your Next Disney Vacation
Creative Cricut Projects
Creative at home projects you can create using your Cricut Explore Air, Cricut Joy, or even the Cricut Maker.