Colorful DIY Wood Slice Garden Markers with Cricut Joy in 7 Steps
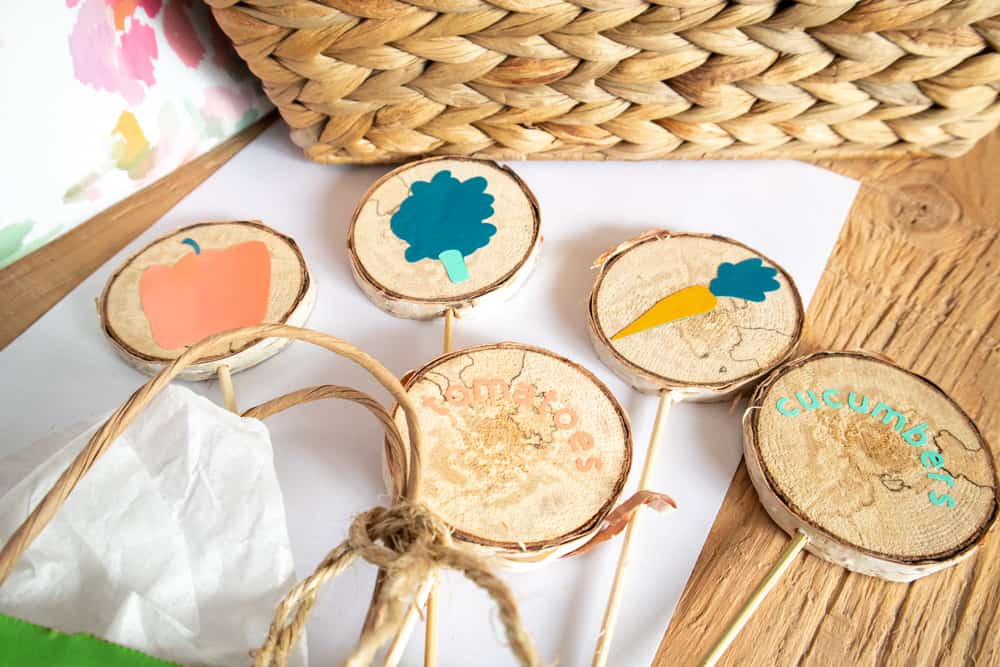
Want to add color to your container garden? These Homemade Wood Slice Garden Markers made with Cricut Joy will be a perfect addition to your garden.

When the weather starts to get warmer, one of my favorite things is to start planning my garden.
While it's a container garden right now, hopefully next year we will have a yard again. There just something grounding about playing in the dirt and growing your own food.
These homemade wood slice garden markers make a great gift too!
Gather the markers together and tie a ribbon around them. Buy the seed (affiliate link) packets for the markers you've made, put it all in a bag, and you've got a great gift for a friend, new neighbor, or just because.
Questions and Answers About Wood Slice Garden Markers
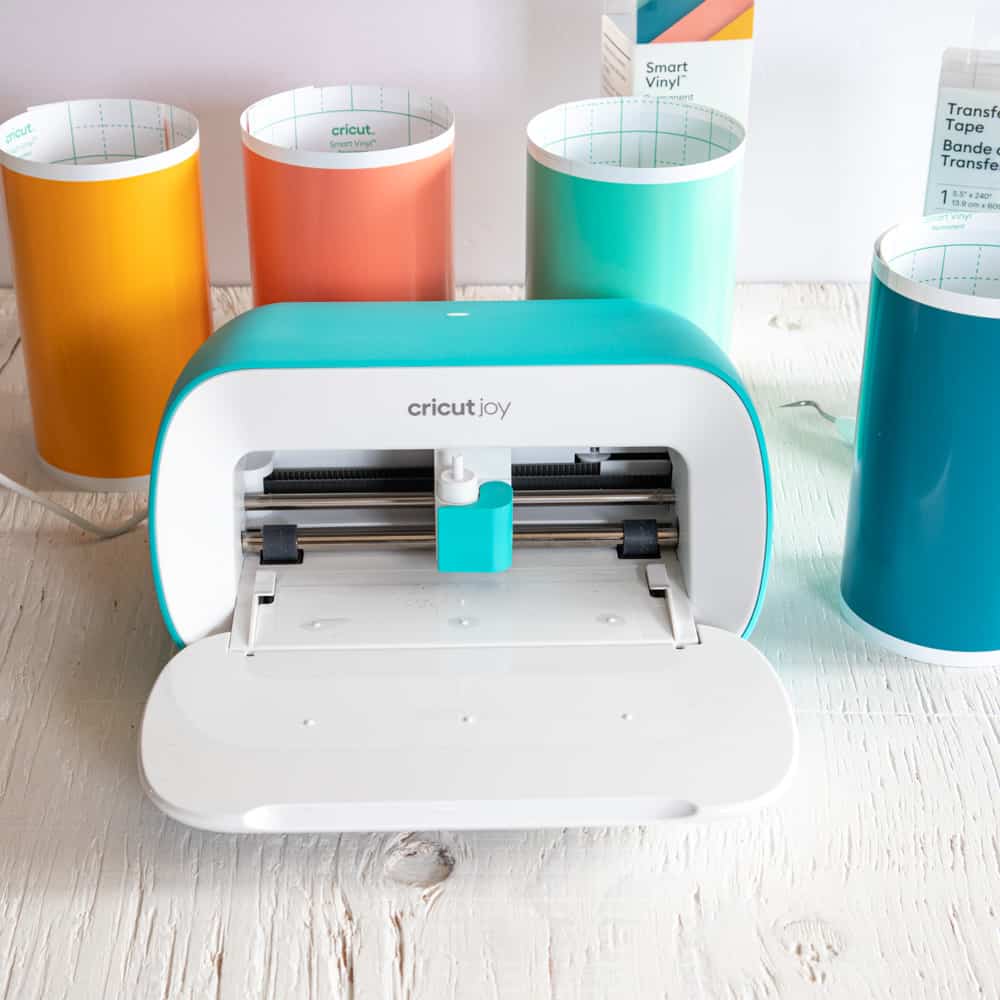
What If I Don't Have a Cricut Joy?
No worries! The (my affiliate link) Cricut Explore Air 2 works perfectly too!
If you have Cricut Explore Air 2, you'll love this homemade mug craft and this mermaid bag using infusible ink!
What Can a Cricut Joy Do?
This little tool can do so much!
With its precision blade, Cricut Joy cuts everything from vinyl and iron-on to cardstock, peel-and-stick label paper, and even that construction paper you already have at home.
Add a pen and turn Cricut Joy into your personal scribe! Create unique labels for your laundry room, inscribe a custom card, or pen the perfect monogram. All you have to do is choose the color, line weight, and your favorite font.
Ready to finally put that quote on the wall? Perfect! Cricut Joy is ready for you. Cricut Joy can cut up to 20 feet at one time – perfect for placing your favorite quote on the wall, creating a galaxy of glittering stars, or making jerseys for the whole team.
Where Do I Buy a Cricut Joy?
Easy! Right on the official Cricut website: (this is my affiliate link) Shop Cricut!
DIY Wood Slice Garden Markers
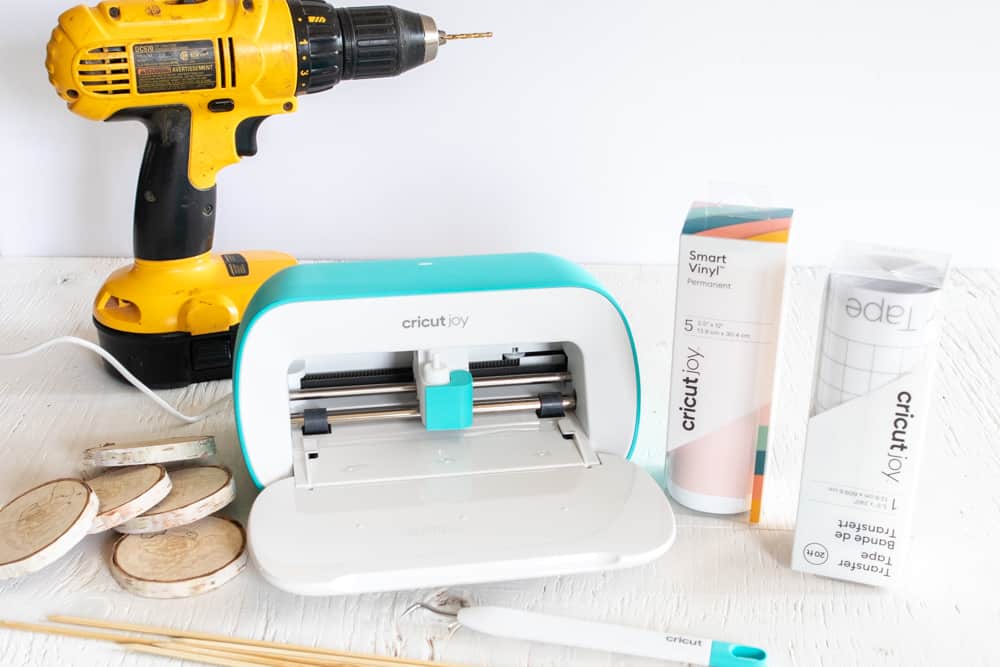
Materials Needed:
Affiliate links are being used.
Cricut Smart Vinyl, Permanent in Beachside Sampler
Cricut Transfer Tape
Weeder
Scissors
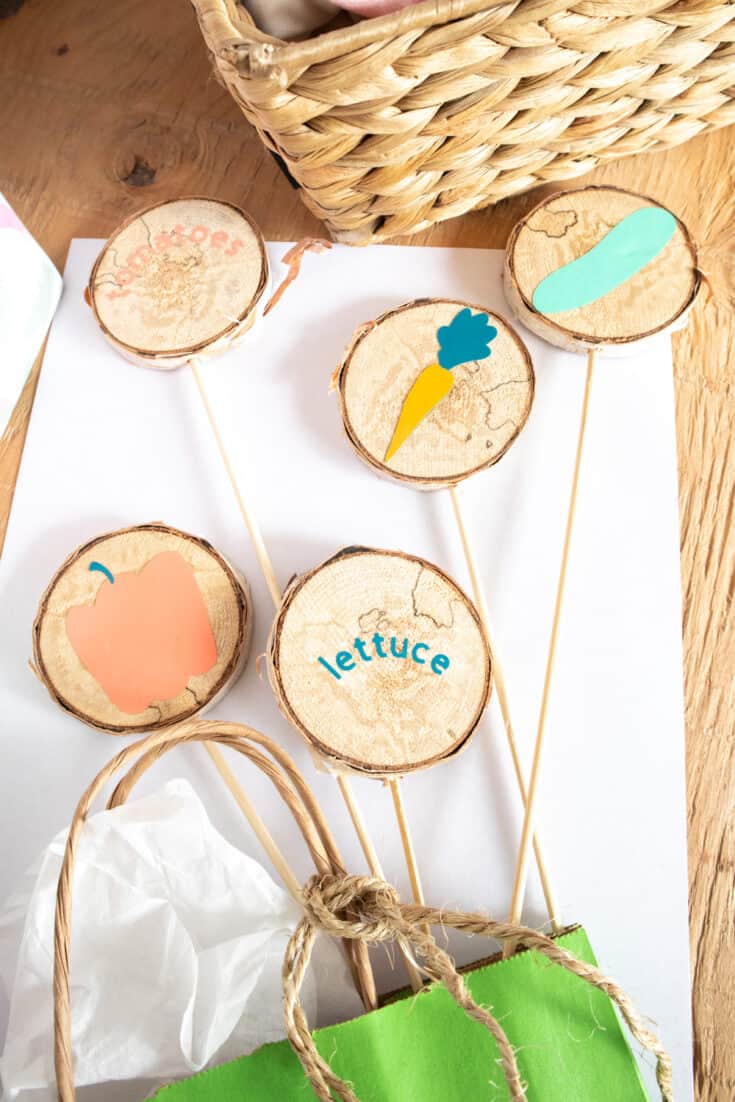
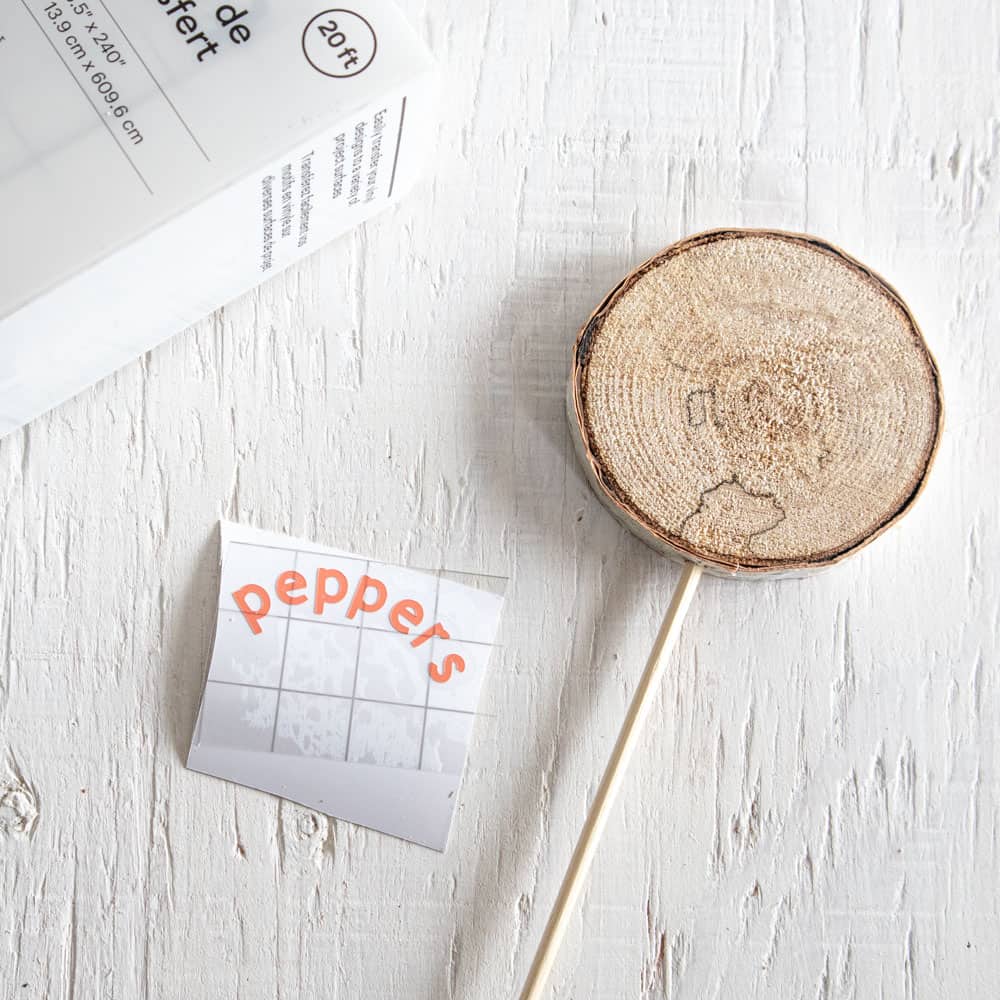
Wood slices, 2.25” diameter
Wooden skewers
Drill
Instructions:
Gather supplies.
Using a drill bit the same size as the wooden skewer, prepare the wood slice by drilling one small hole into the slice as shown.
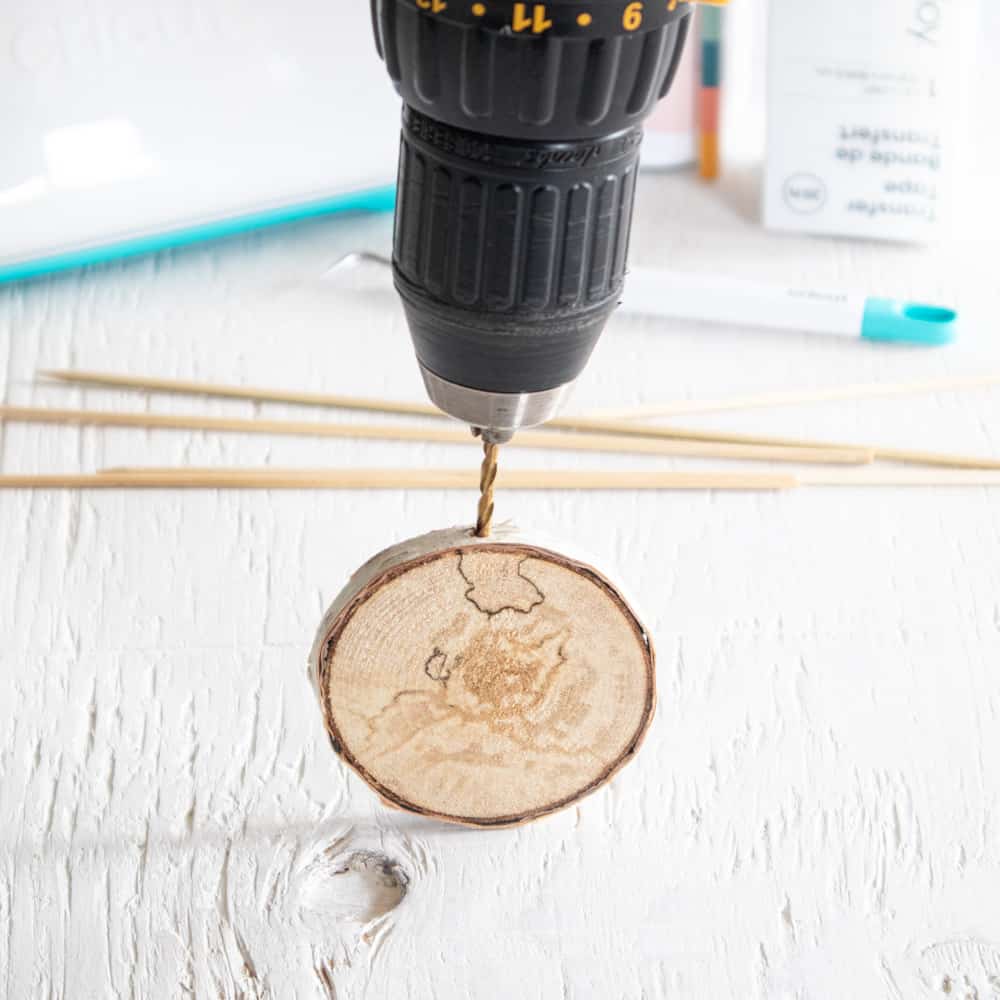
Insert a wooden skewer into the drilled hole.
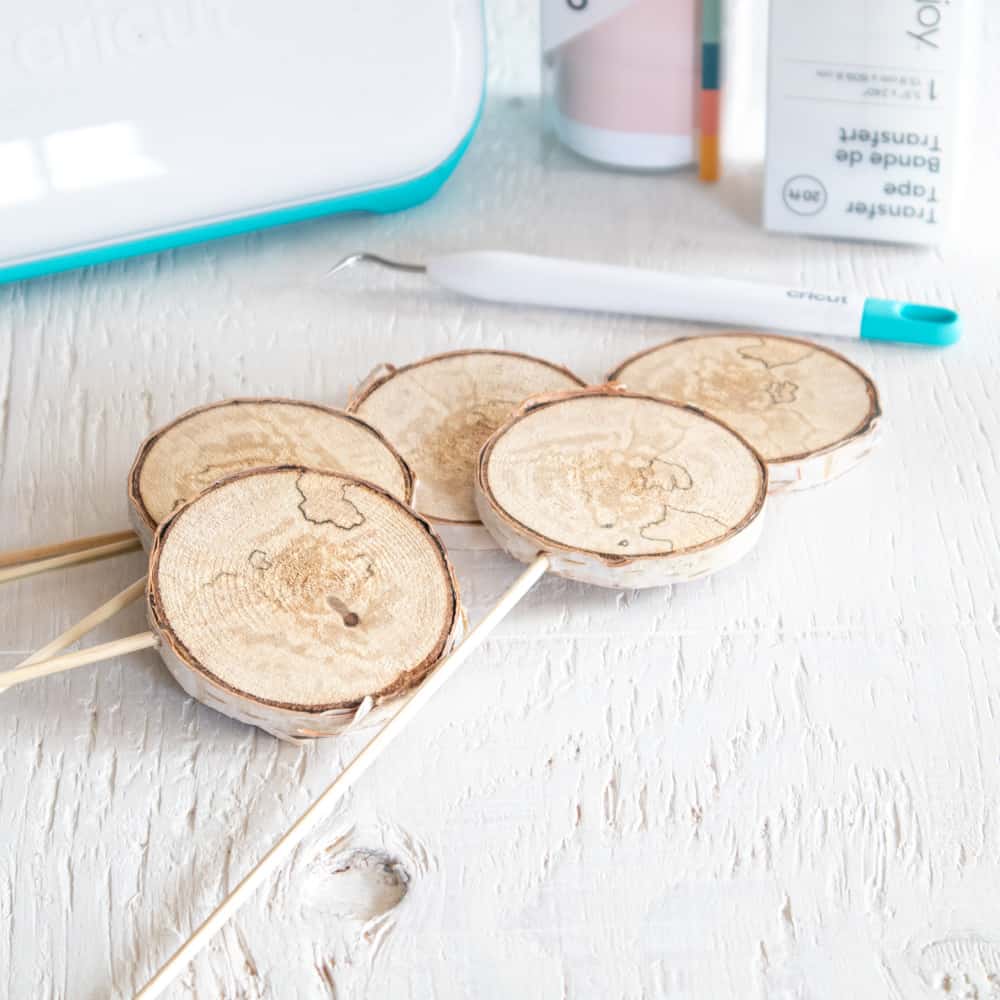
Repeat with all wood slices and put aside.
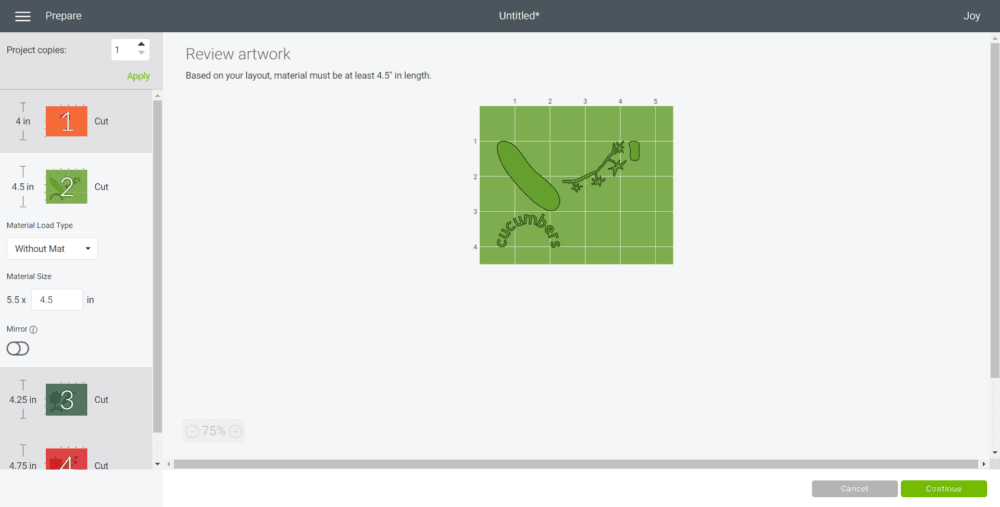
On a new canvas in Cricut’s Design Space, select Images from the toolbar.
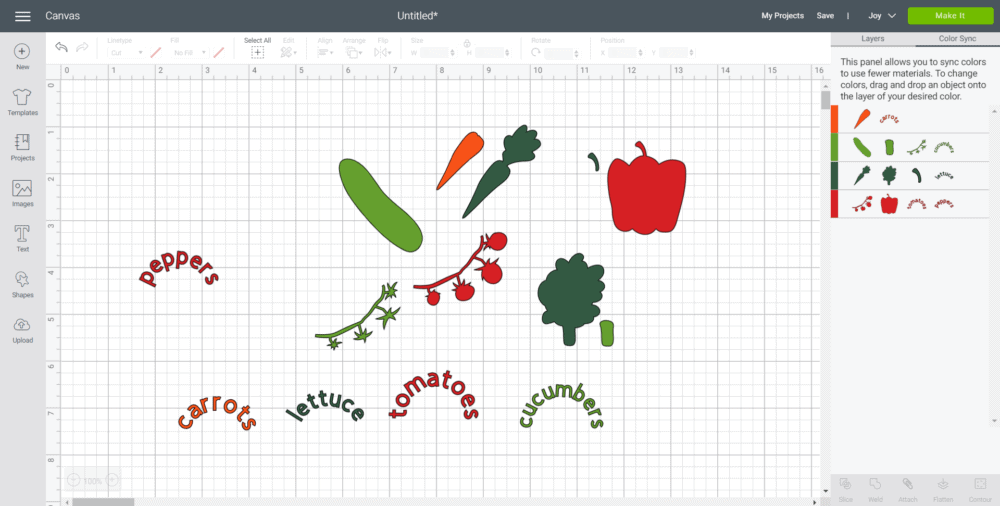
Click on the Food and Kitchen theme and then type “vegetables” in the search engine.
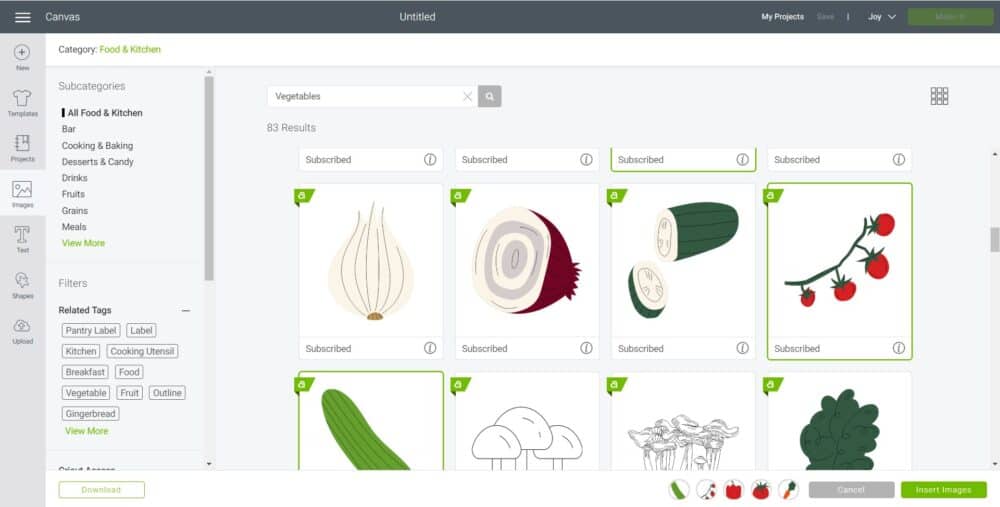
Select the vegetable images you want to use, such as tomatoes, lettuce, carrots, peppers, and cucumbers.
Insert the vegetable images onto the blank canvas.
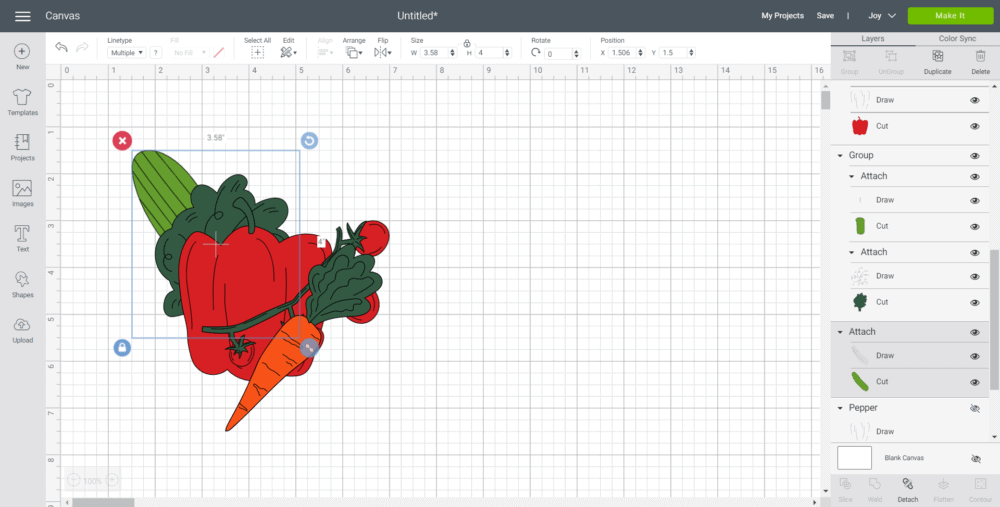
Select the image and hide all the drawing lines from the layers toolbar.
Select the image again and adjust the size to 2” high (or wide), whichever side is the biggest.
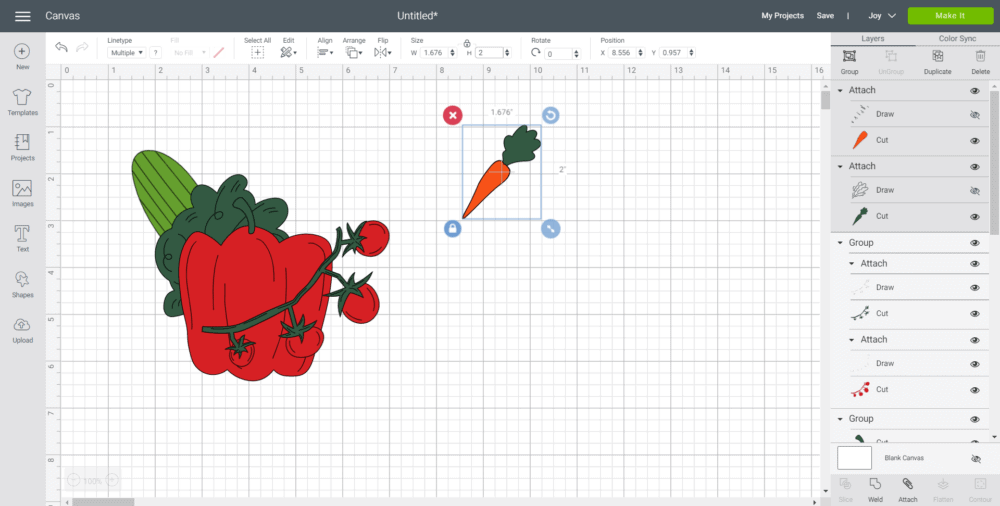
Select one image and then click on “Ungroup”. If the image is still attached, click on the “detach” button. This will separate the image pieces into their own layer.

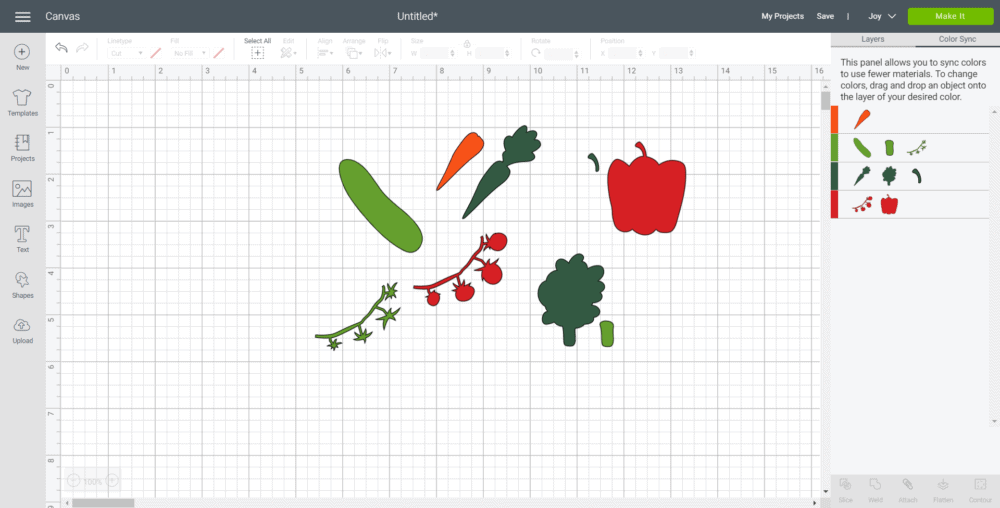
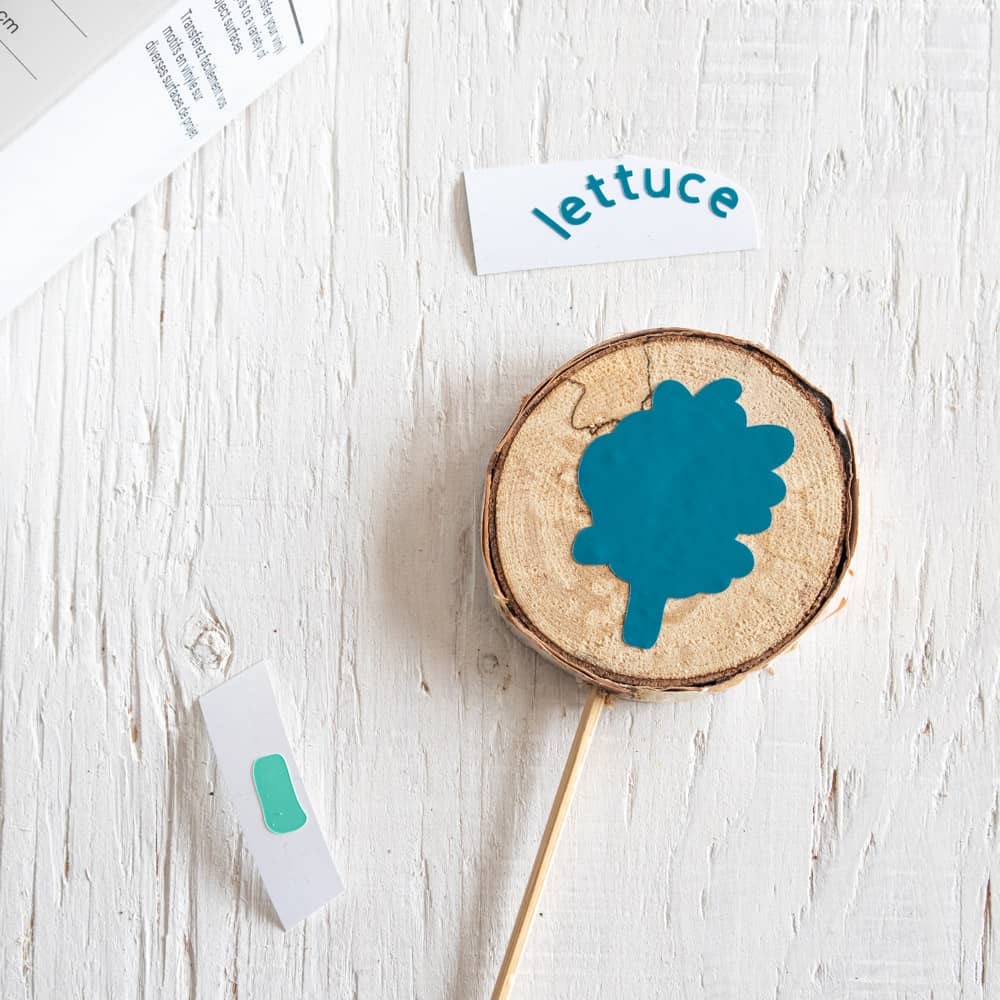
Move to the Color Sync tab to sort images by the color of Smart Vinyl: cut the carrot in tangerine; cut cucumber and a leafy portion of carrot and tomatoes in mint; cut lettuce in teal; cut tomatoes and peppers in coral.
Add text for the back side of the garden markers.
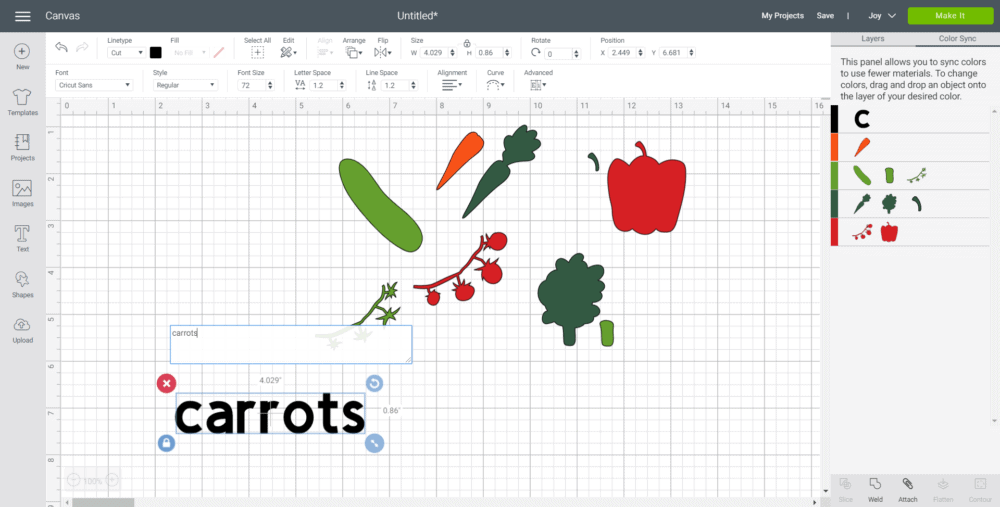
Select Text from the toolbar and type out the vegetable: carrots.
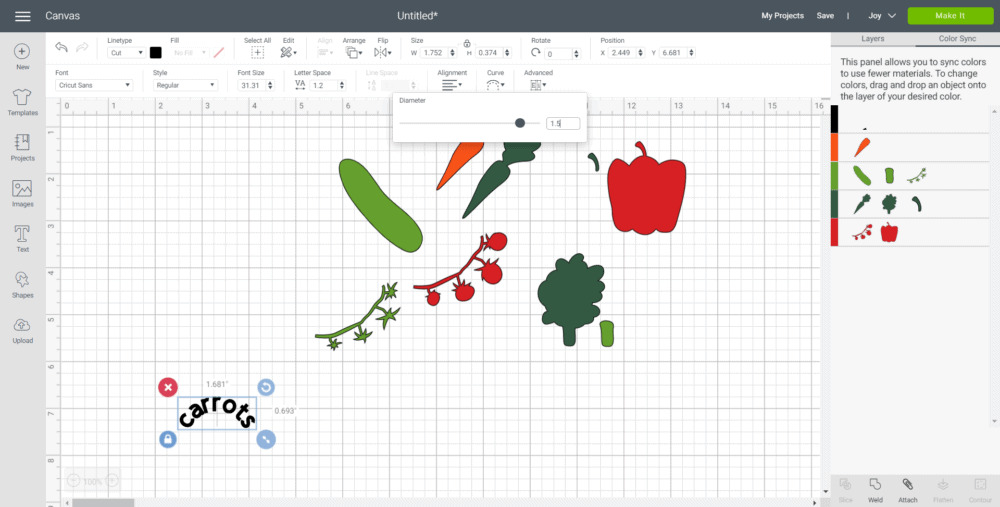
Adjust text size to 0.375” high.
Adjust the curve to 1.5.
Adjust the letter spacing to 1.8.
Weld the lettering together and move the text layer to the appropriate color sync layer (for example “carrots” to be cut out in tangerine Permanent Smart Vinyl).
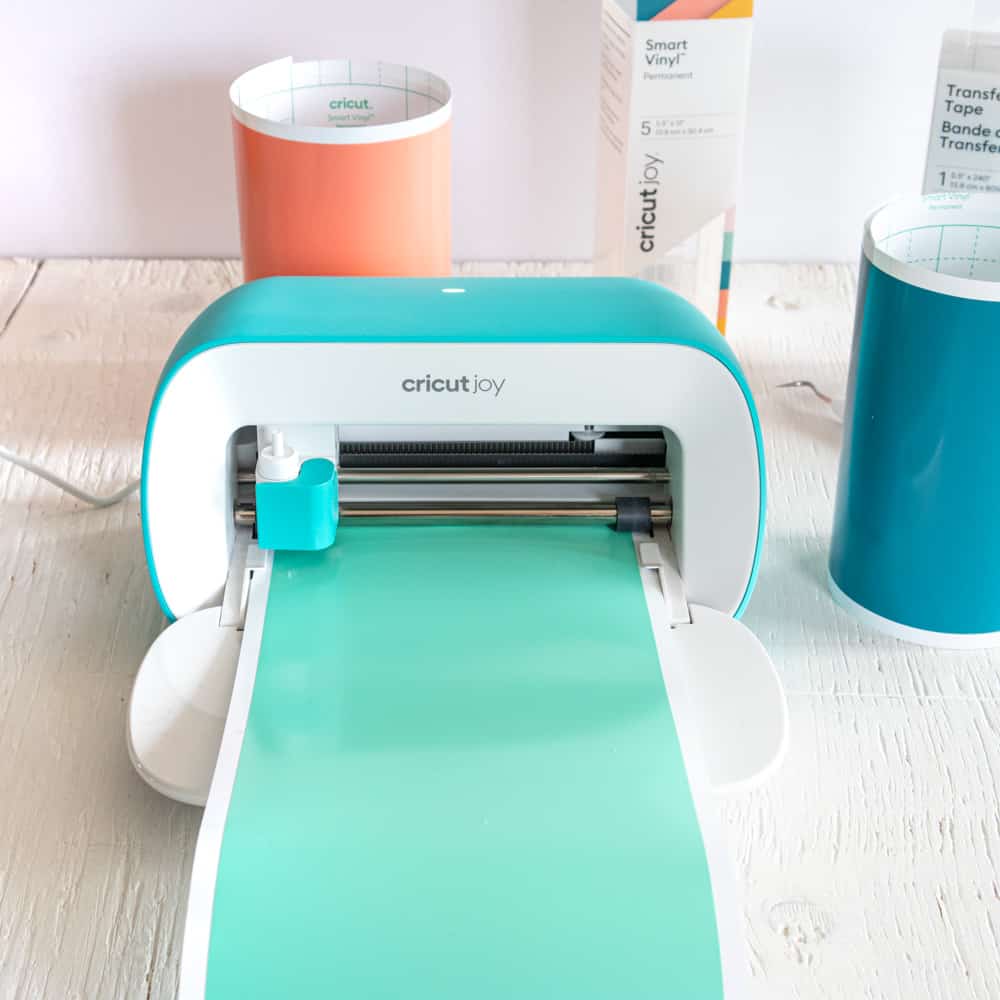
Ensure the cutting machine is set to Cricut Joy. Select “Make It” in Design Space.
Set material type to Smart Vinyl, Permanent.
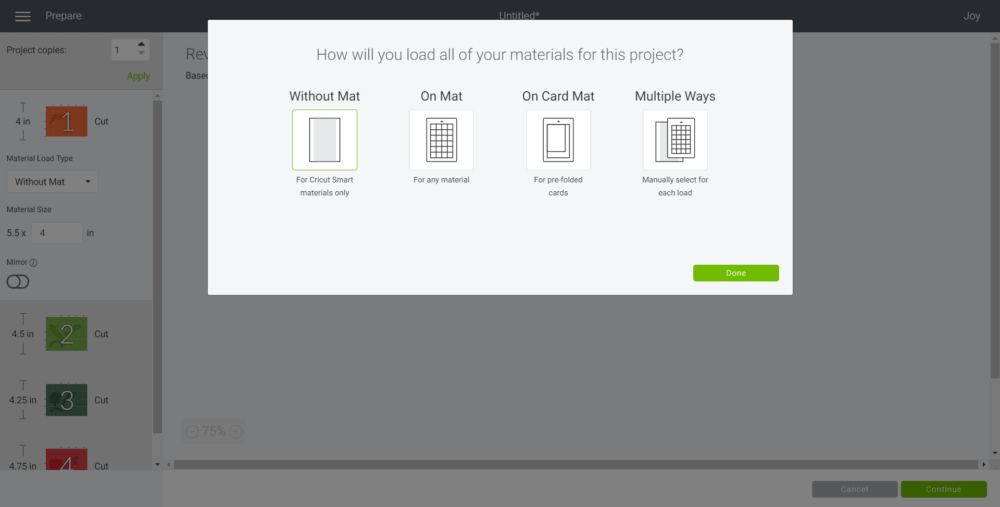
Choose “No Mat” from the list of cutting options.
Follow prompts for loading Smart Vinyl into Cricut Joy and cutting. When the cut is complete, unload the mat from the machine.
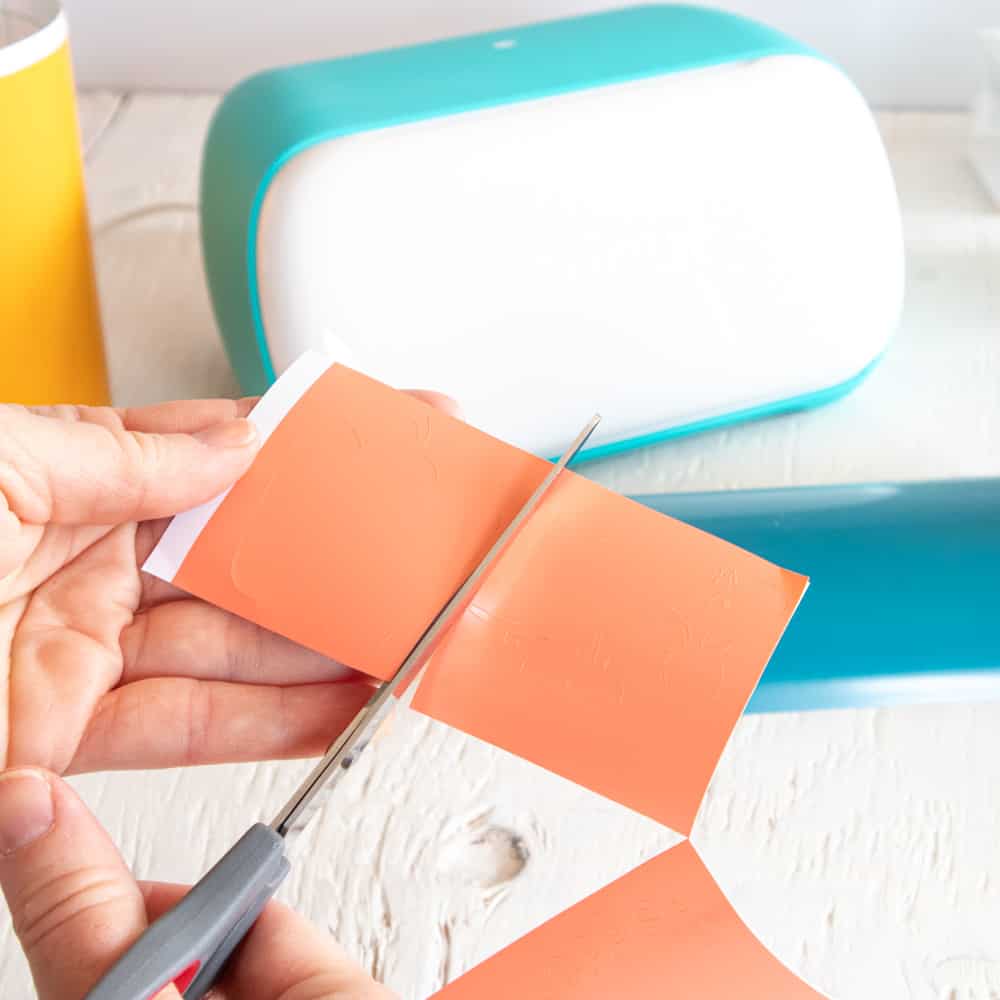
Cut around each image and lettering with a pair of scissors.
Using the weeding tool, peel away the excess vinyl around the cut images (and lettering) and discard.
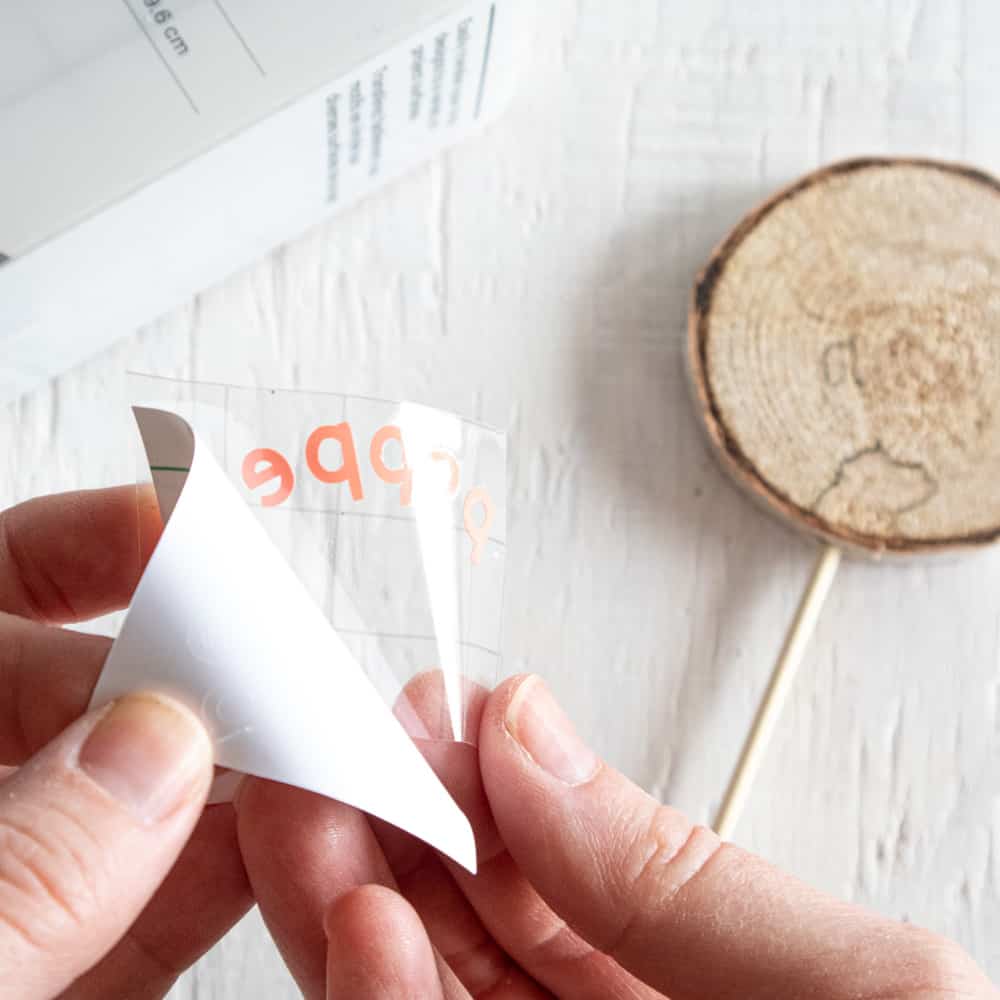
Cut a piece of transfer tape a bit larger than the size of the image.
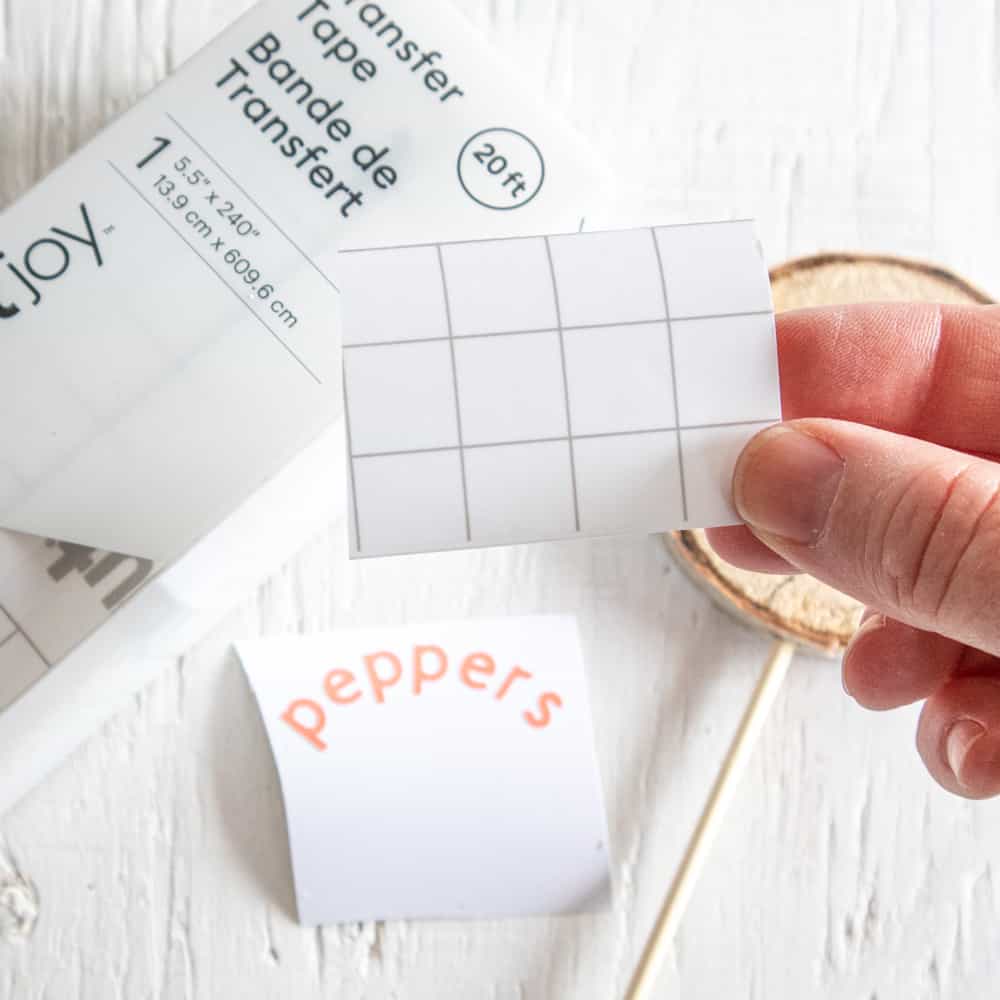
Peel away the transfer tape backing and place the transfer tape overtop of the cut vinyl.
Gently rub the vinyl to help it stick to the transfer tape.
Peel away the vinyl backing, leaving just the image adhered to the transfer tape.
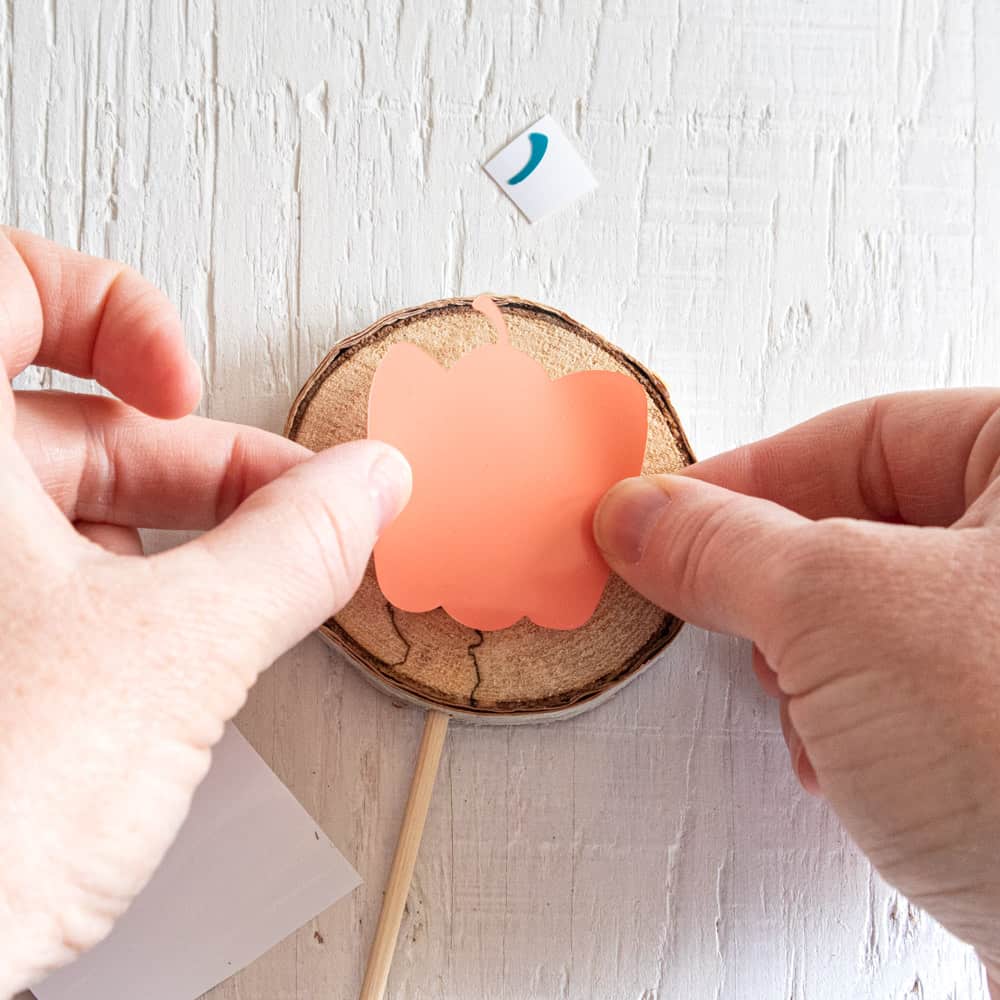
Position the image with the transfer tape onto the center of the wood slice and press it in place.
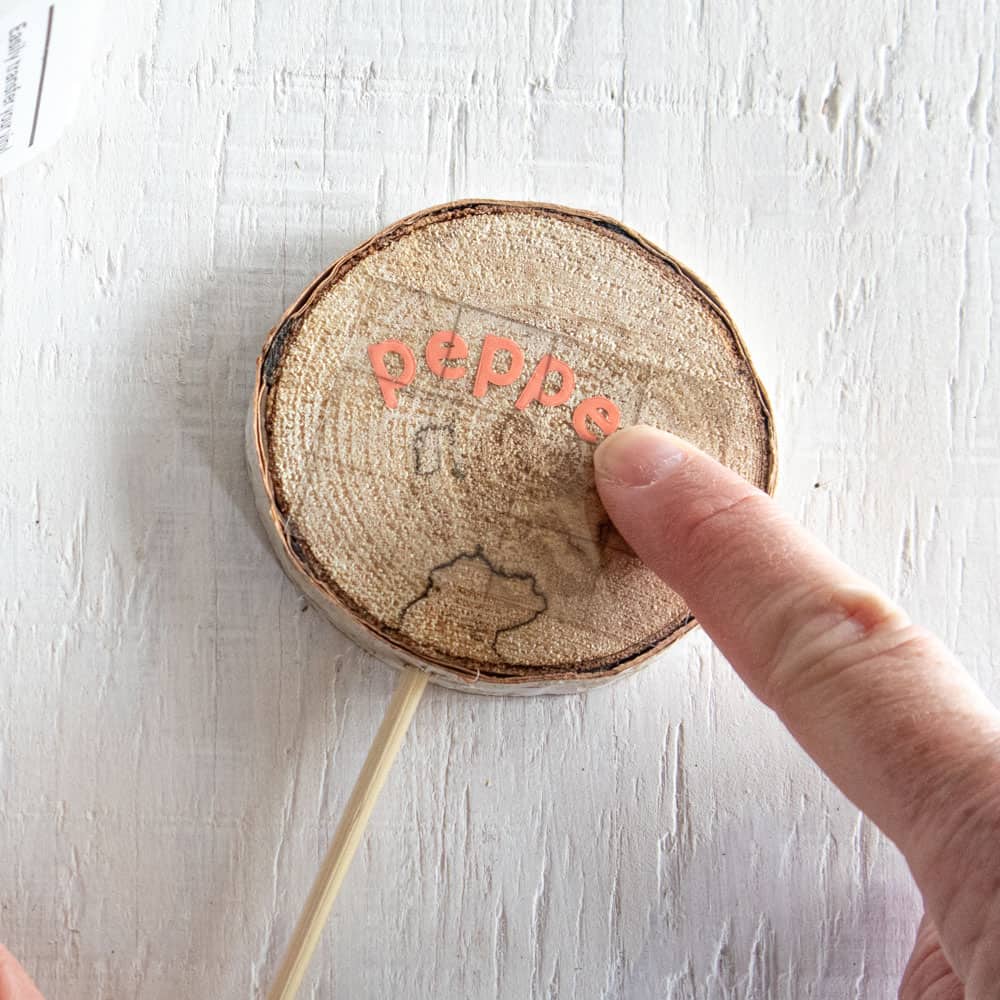
Press the Smart Vinyl image down with your fingers or with the Cricut scraping tool to help it to stick to the wood slice.
Slowly and carefully remove the transfer tape leaving the vinyl image on the wood.
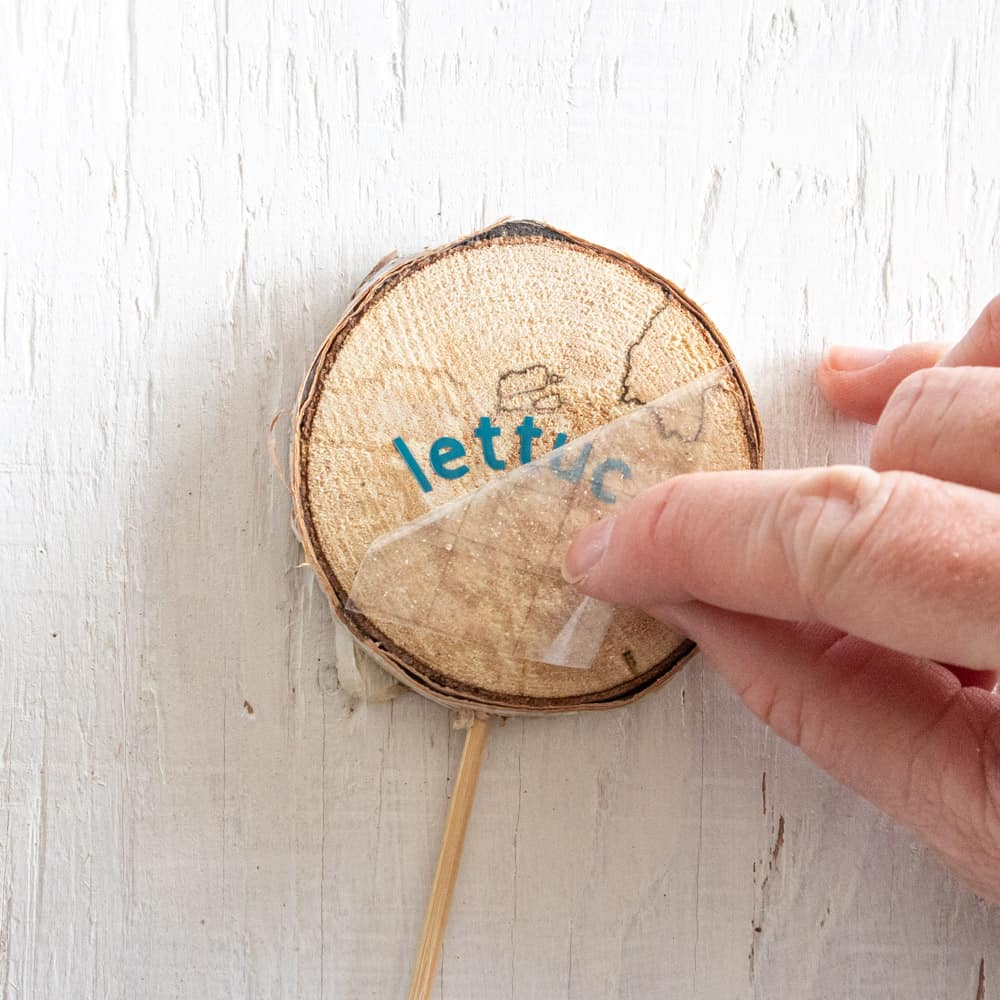
Repeat with the image on the reverse side of the wood slice.
And continue these same steps for the remaining garden markers.
How fun was this craft using Cricut Joy? I can't wait to add these to my garden!
What is your favorite Cricut Joy project?