How To Make An Easy DIY Portable Sandbox In Less Than 5 Minutes
Imaginative play is crucial for children's development, sparking creativity and helping them explore new ideas and scenarios. This DIY portable sandbox is a fantastic tool for imaginative play as it allows kids to build, dig, and create entire worlds from their imagination. They can become architects, explorers, or anything else their minds invent.
This sandbox requires zero effort to set up and maintain, meaning you won't have to worry about complicated assembly or frequent upkeep. It’s designed to be low-maintenance.
When it comes to cleanup, this sandbox is designed with simplicity in mind. It’s easy to wipe down or clean out, so you can quickly address any mess without spending hours scrubbing or reorganizing. Plus, the sandbox’s design ensures that sand stays contained and doesn't spread throughout your home or back porch, making cleanup a breeze and keeping your space tidy.
Overall, this DIY sandbox is a blend of fun and convenience, offering a clean, imaginative play experience with minimal effort on your part.
Mess Free DIY Portable Sandbox
We all have those messy days sometimes. Those are the days of spilled milk, trails of Cheerios, and splashed bath water. It's on those days that I truly appreciate a mess-free activity like this DIY Portable Sandbox. It's perfect for taking on playdates, moving around the backyard, or sensory time indoors.
Exactly what moms need to keep little hands busy and creative.
A mess-free sandbox?
For the most part, yes. In its typical play state, it's easy to clean up activities that may be exactly what a mom needs.
Even though I love the hands and feet that make the messes, I still get tired. I have busy days when the to-do list is long, and sometimes a simple activity that inspires creativity is a great solution.
How to Make an Easy DIY Sandbox in Less Than 5 Minutes
This DIY Portable Sandbox is a project that anyone can tackle.
In fact, I recruited my 5-year-old to help.
What You Need to Make a Simple Sandbox
There's a good chance that you've got some of these items on hand. Collect what you have, make a few purchases, and then spend an afternoon creating with the kids.
Here's what you'll need:
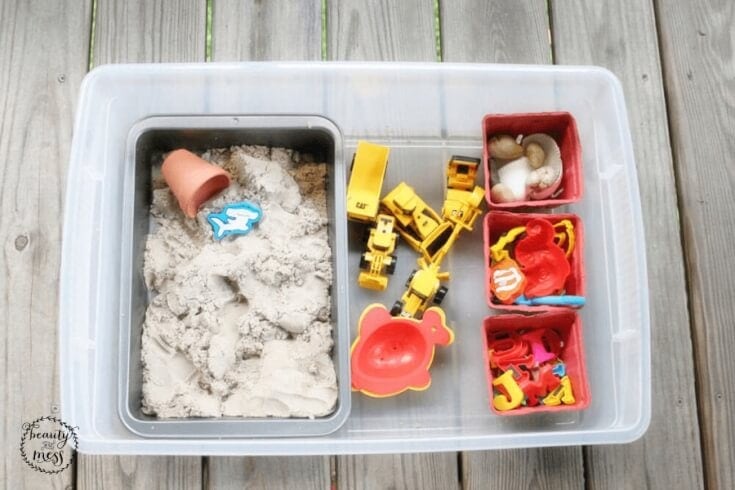
- Plastic Storage Tote
- Baking Pan with Lid
- Kinetic Sand
- Chalk Paint
- Chalk Marker
- Protective Gloss Spray Paint
- Small Toys (Toy Cars, Shapes, Letters, etc.)
- Natural Items (Seashells, Rocks, etc.)
How to Make a DIY Portable Sandbox with Cover
Many days when I need to work from home, we head out to the deck. I'll pull out our sandbox and the kids will spend hours playing.
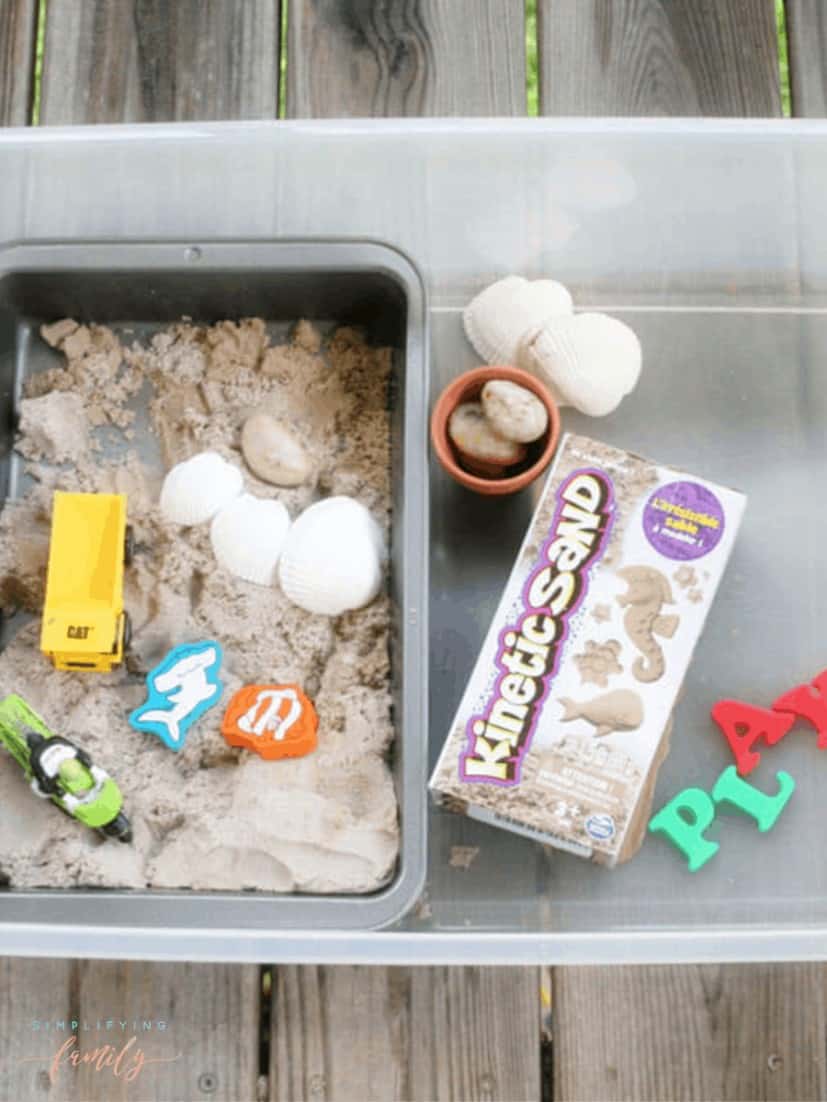
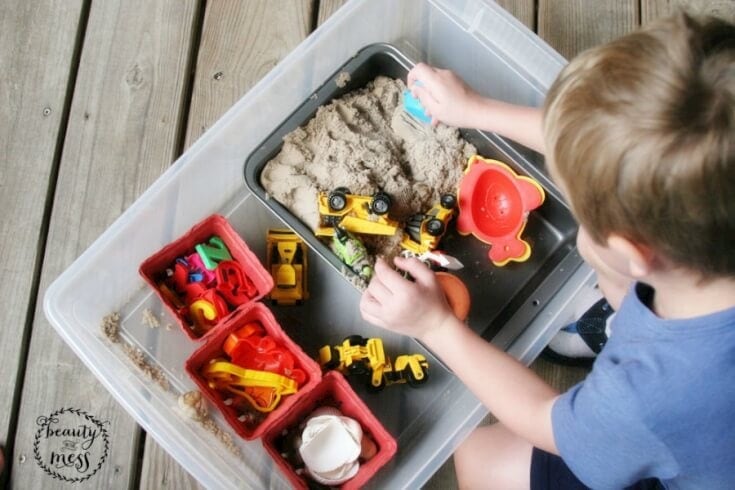
The sandbox is filled with Kinetic Sand, which is different than traditional sand. Instead of sticking to people, Kinetic Sand sticks to itself.
This means that after playtime, the kids aren't covered in sand from head to toe. Plus, Kinetic Sand can be squeezed, pulled, and shaped since it naturally sticks to other pieces of sand. You don't need to mix in water to build a sand castle, for example.
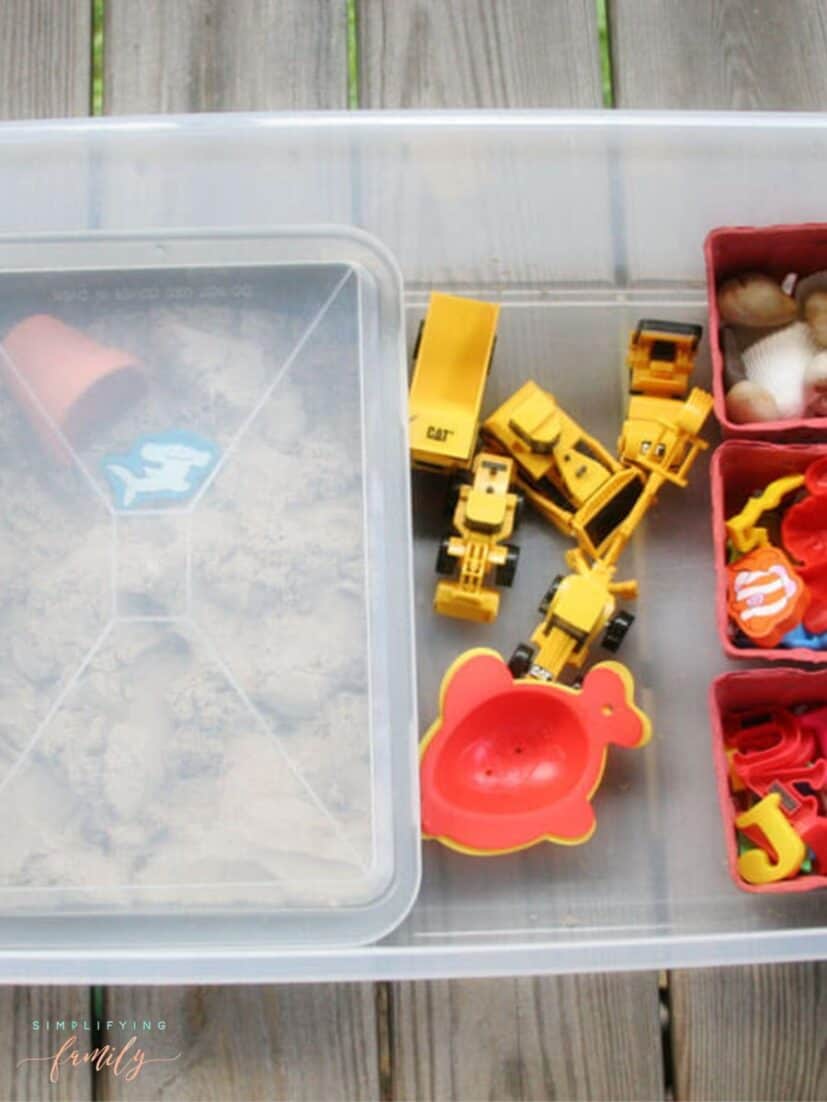
My son received Kinetic Sand as a gift and I wasn't sure how to store it after we opened the box. As a quick solution, I used a lidded baking pan to hold the sand and set it inside a larger plastic storage tote. It was a quickly made decision that turned out to be the perfect activity box.
We leave it on our deck and the plastic box is weatherproof. If sand spills out of the baking pan, it lands inside the storage tote instead of on the deck. When playtime is over, the sand and toys all fit nicely inside the plastic container.
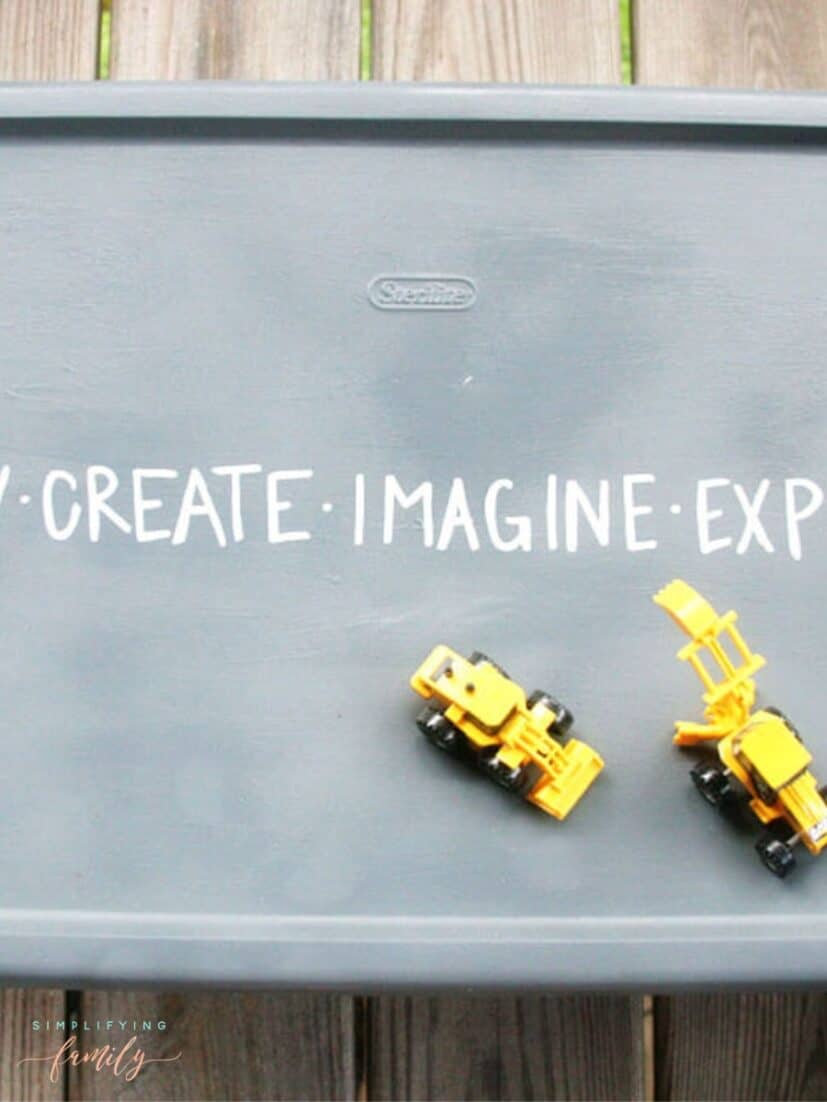
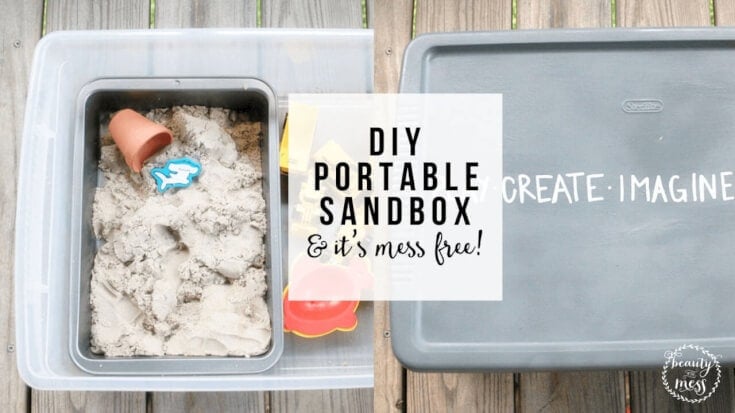
How to Paint the Cover of a Portable Sandbox
Since it's been such a hit, we decided to make the storage box a bit more kid-friendly. You may be familiar with Martha Stewart Vintage Decor Paints which work on practically any surface, including plastic.
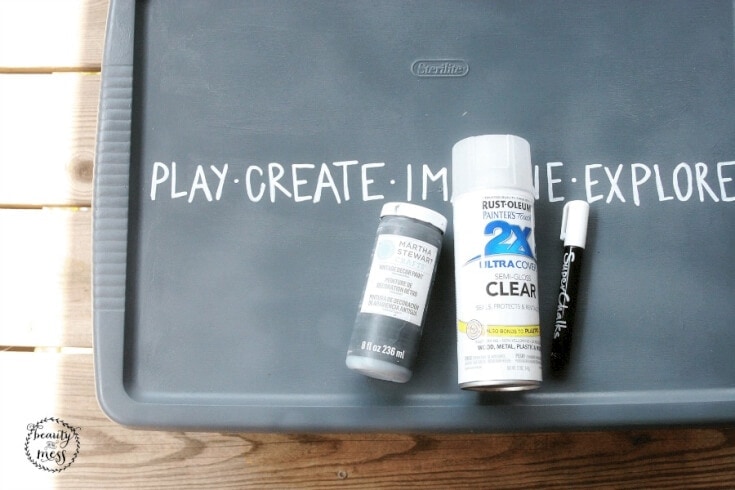
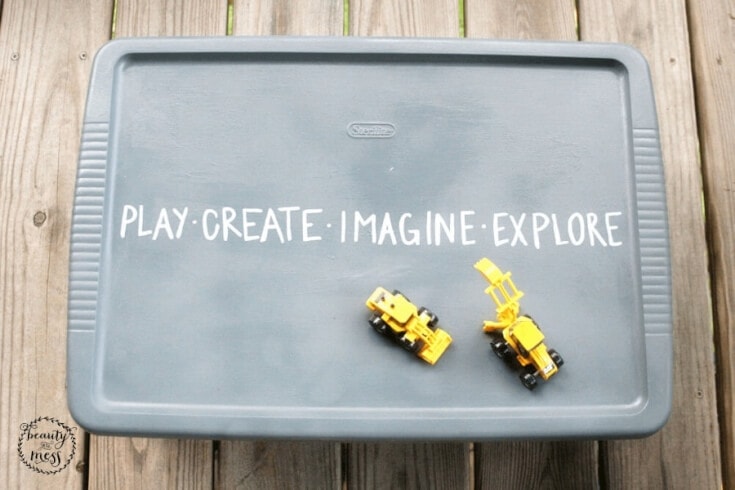
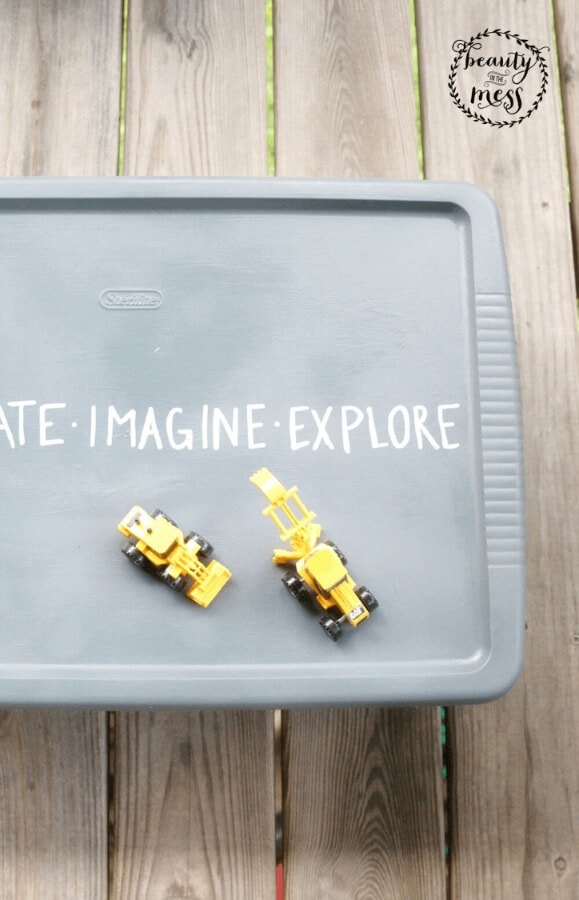
After covering the storage tote lid in a few coats of charcoal, I used a chalk marker to add playful words and personalize it for the kids. To keep the chalk marker from smearing or fading over time, give it a coat of protective clear spray paint.
As a note, chalk paint is not the same as chalkboard paint. However, that doesn't mean you can't use a chalk marker. A chalk marker will write on many surfaces, but it may not be erasable. I like to use a chalk marker in the same way that a paint pen is used: to add detail, text or decoration to a craft project. If you are talented with a paintbrush, a marker isn't necessarily needed.
DIY Portable Sandbox Ideas
Our sandbox is filled with beach-themed toys, letters, and construction equipment.
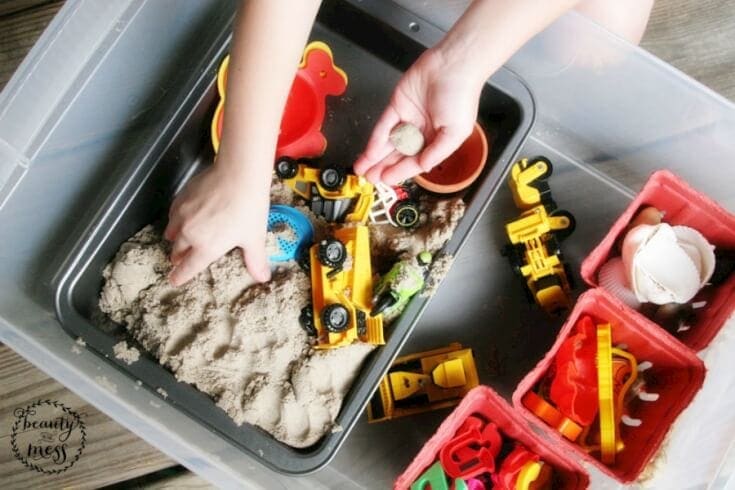
My son buries seashells and rocks underneath the sand using dump trucks and excavators. The letters (magnetic, typically for the fridge) work like Play-Doh shapes and can be pressed into the sand to create words. Ocean animals give it a beach theme to inspire pretend play.
We leave the sandbox on the deck but have moved it to the front yard when we're working in the flower bed. It's perfect for travel when going to a friend's house or when you need an indoor activity when it's too hot outside to play.
It's portable, functional, and flexible for a family.

I love that this activity lends itself to creativity. It's that trait that makes it something the kids can enjoy for hours. This homemade portable sandbox really does encourage the kids to Play, Create, Imagine, and Explore.
Some days go smoothly, and a messy craft may be right up my alley (like greeting cards made from a child's painting). On days when there is work to be done, this portable sandbox activity is a great option to keep them entertained and mess-free.
What Is Kinetic Sand?
Kinetic sand is a unique and engaging material that has gained popularity for its fun and versatile play potential. Made from 98% sand and 2% polymer, it combines the feel of wet sand with a mess-free experience. The polymer binds the sand particles together, allowing the sand to stick to itself but not to other surfaces, creating a tactile, moldable substance that children can shape and manipulate.
One of the standout features of kinetic sand is its ability to offer imaginative and sensory play. Kids can build, sculpt, and create with ease, while the sand’s soothing texture provides a calming sensory experience. It's an excellent tool for developing fine motor skills and encourages creative exploration. Additionally, kinetic sand is designed to stay within its play area, minimizing mess and making cleanup a breeze.
In terms of practicality, kinetic sand is low-maintenance and easy to store. It typically comes in resealable containers, which helps keep it dust-free and ready for the next play session. While it’s non-toxic, it’s important to supervise young children to ensure they don’t ingest it. Overall, kinetic sand is a durable, enjoyable alternative to traditional sand, offering endless fun with minimal effort and mess.
How to Make Kinetic Sand
Can't get to the store to buy kinetic sand? No problem! Here's all you need to make your own kinetic sand with three ingredients.
Homemade Kinetic Sand Ingredients
Sand (if you want colors, use decorator sand)
Cornstarch
Oil (baby oil or cooking oil is great!)
How to Make Kinetic Sand at Home
Once you have your ingredients, it's easy to make your own!
Simply add five parts sand to three parts cornstarch, with one part oil – using the ratio 5:3:1.
Mix until there are no oily or dry spots.
You'll never run out of sand for your DIY portable sandbox again!
How are you encouraging your children to play, create, imagine, and explore?

My name is Lora Green and I blog at Craftivity Designs, where I document how we are creating our home. I believe that a home is about much more than design and decor–it should tell the story of a family. Our home should fit the needs of two small kids, a work-at-home mom, and a youth pastor dad. I want it to be a beautiful space, but it must be functional and meaningful, too. If you are trying to meld function and beauty, join me over at Craftivity Designs and share in this journey of creating a home.

This is adorable, frugal and imaginative.
I love how we can assemble everything in one neat box we can carry anywhere.
Great idea Lora! 🙂
Thanks!! 🙂 Glad you stopped by!
What a great idea! I think I’m going to make one for each of my boys. The baking pan is such a great idea for storage of the sand, and I love how you decorated the outside container.
Thanks!! Your boys will love it!
What a great idea!!! I need to make one for my little man!
Thanks, Susannah!
This is such a great idea! Who wouldn’t want to play in it? 🙂
My little guy and his friends have a blast with it 🙂
I really love this idea to store kinetic sand and pull it out as a fun activity to occupy my toddler from time to time. I havn’t had much success with the traditional style sandpits in the past so this will be a good alternative. thanks you!
So much cleaner 🙂