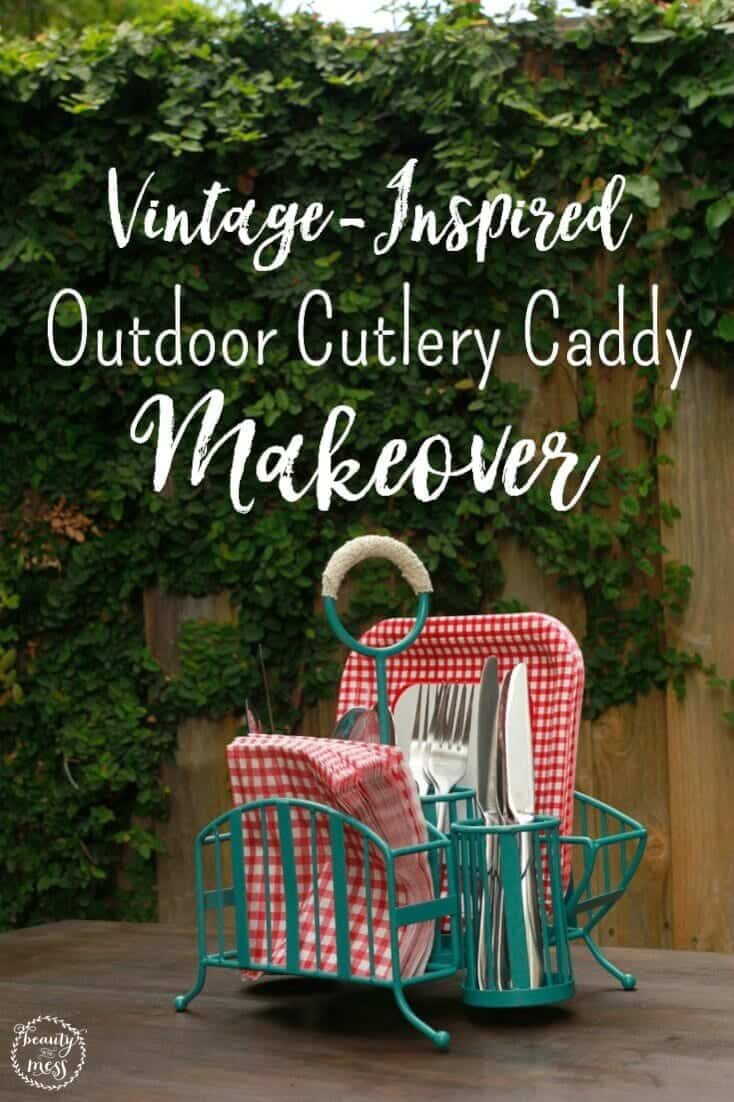
Easy Vintage-Inspired Outdoor Cutlery Caddy Makeover Tutorial You Can Make Tonight
A quick cutlery caddy makeover can provide a pop of color for a fun vintage look, and you'll have an organized outdoor entertaining space for the summer!
by Jolene Tang, Contributing Writer
Having a cutlery caddy is a great way to organize an outdoor entertaining space in preparation for the upcoming summer months. It makes it easy to transport silverware, plates, and even napkins from kitchen to patio without much of a hassle. It can also keep things from being blown away by the wind, which makes it perfect for outdoor parties when the weather isn't being cooperative!
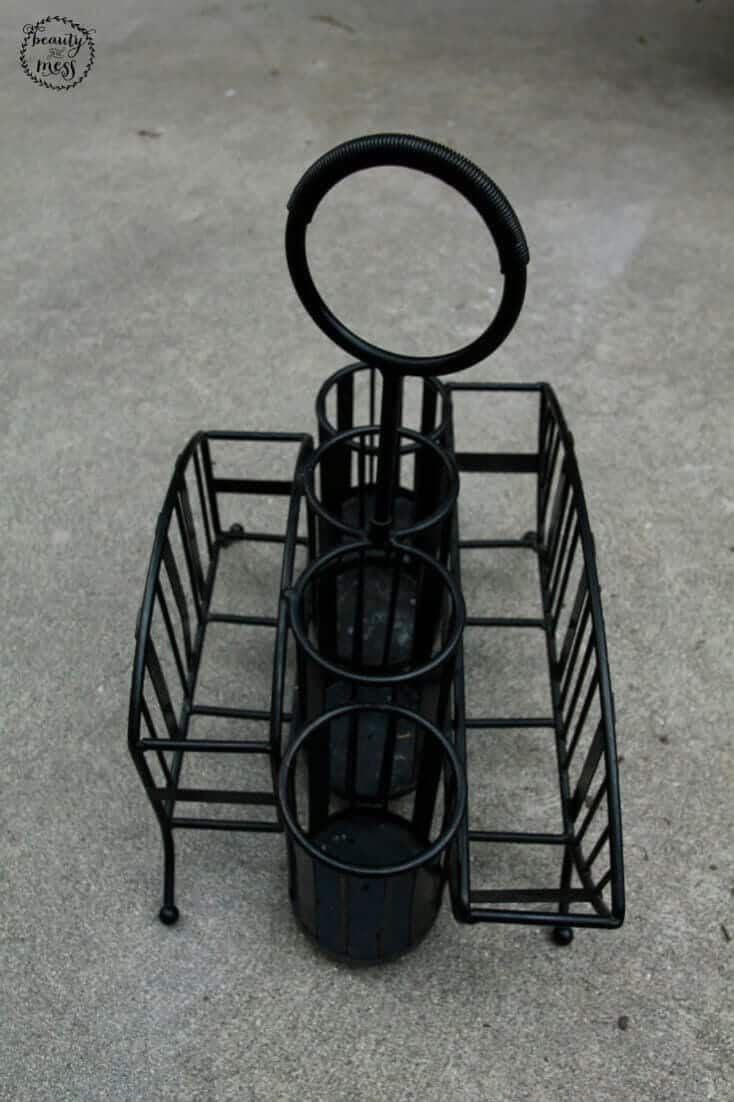
I recently found a caddy at the thrift store and knew it was just what I needed. But I decided to give it a little bit of a makeover before putting it to use.
Keep reading to find out what you'll need if you want to do this project yourself, and to see my ideas for doing a DIY version of this from scratch.
Outdoor Cutlery Caddy Makeover Tutorial
MATERIALS NEEDED:
- Cutlery caddy
- Spray paint (preferably paint + primer in 1)
- Lace tape (optional)
STEP 1: CLEAN THE CADDY
Because my caddy had been sitting at the thrift store for a while, it had acquired some dust and gunk. So the first thing I did in preparation for the spray paint was to clean it thoroughly.
STEP 2: SPRAY PAINT THE CADDY
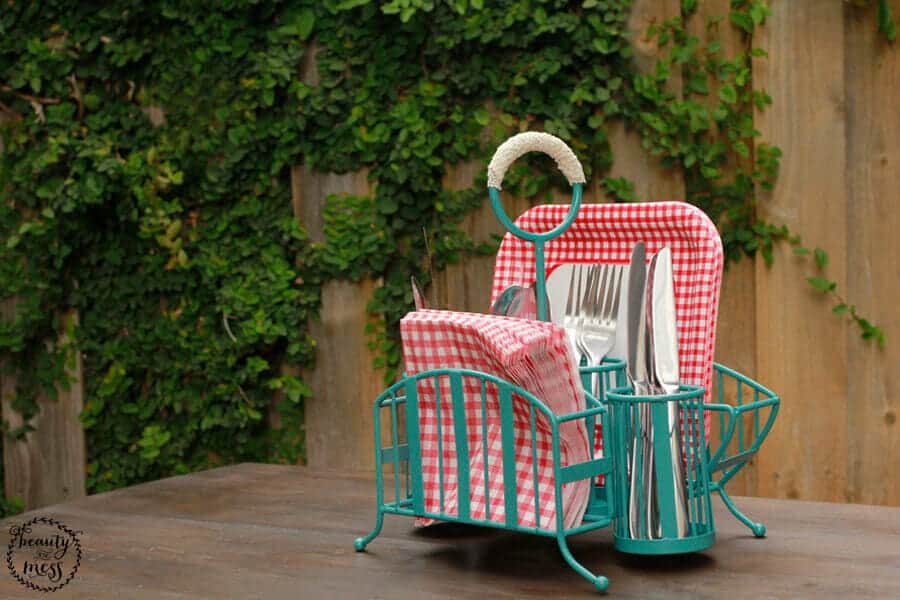
The spray paint that I used for this project is actually a combo can of paint and primer, which was definitely a time-saver! And the color that I decided on was Antique Teal by Rustoleum.
Bonus spray painting tips:
- Always start off with a light layer of spray paint and wait until it's fully dry to do another one. This will help you avoid ugly paint drips, which is what always happens when a layer is sprayed on too thick.
- However, paint drips can be sanded down once they're dry, and then you can do another layer of paint on top.
- Don't spray in a place that is too windy or dusty.
- Protect your flooring with brown craft paper, a large plastic tarp, or a drop cloth.
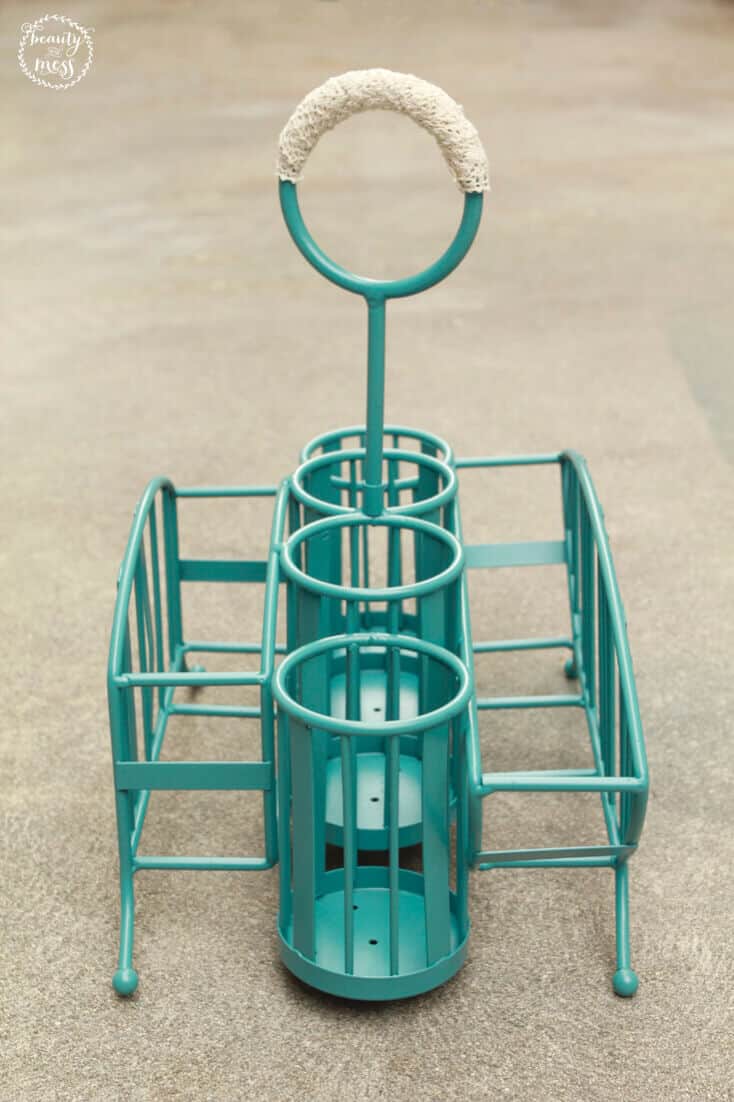
STEP 3: ADD LACE TAPE (OPTIONAL)
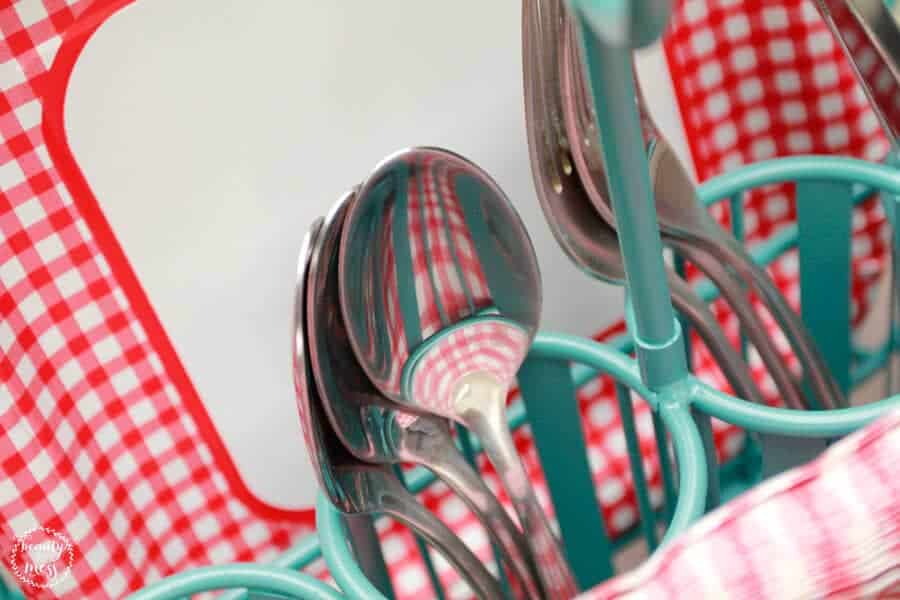
After letting my caddy dry overnight, I decided to cover the top half of the handle with lace tape. I love this stuff because it works well for so many projects and it is so easy to use!
You might remember that I used this product in my Easter egg decorating post from a few months ago! You can read that here.
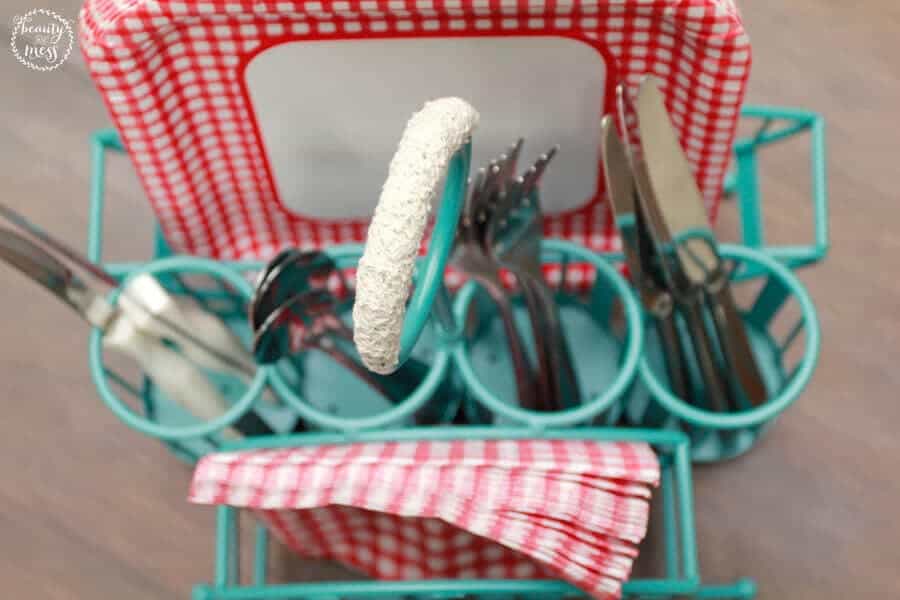
Once I added the tape, it was time to do a test run with my caddy!
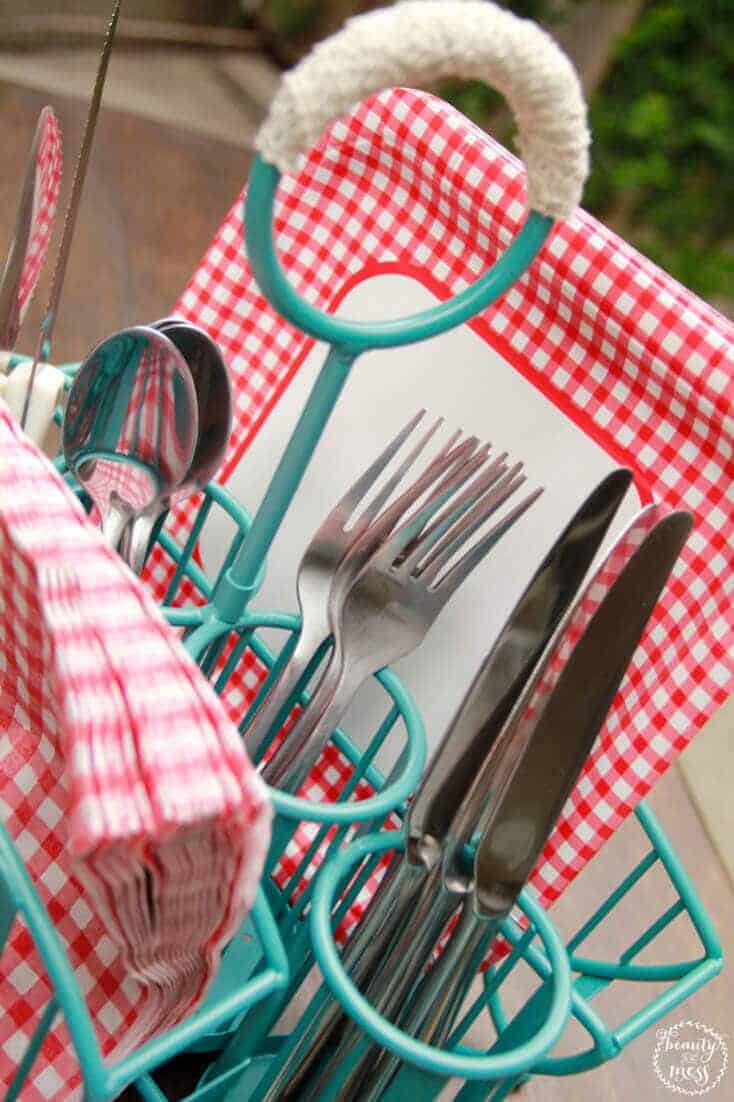
I grabbed some colorful picnic paperware from the dollar store and pulled out our everyday silverware, then filled it up.
The checked red pattern of the plates and napkins added even more to the vintage vibe, which I am so loving!
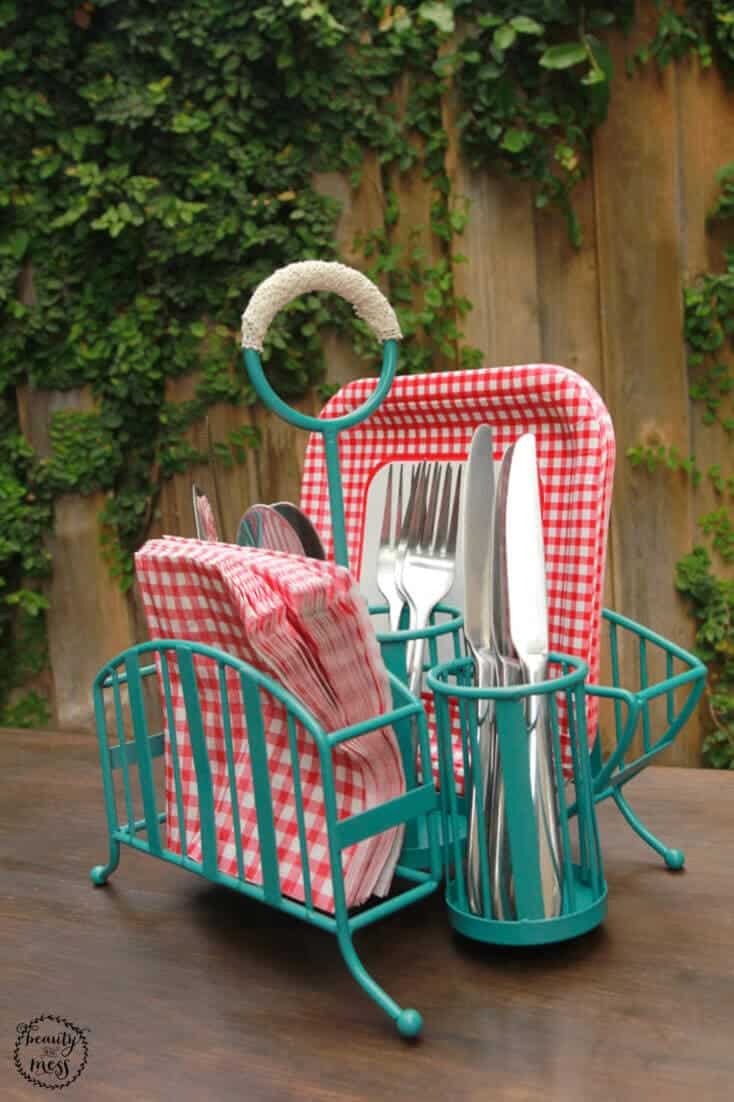
I think this would be great decor for a Father's Day BBQ or even a Fourth of July hangout!
DIY FROM SCRATCH IDEAS
Just in case you have trouble finding a caddy similar to mine at the thrift store, I decided to jot down some ideas for you on how to make one from scratch!
I would use mason jars to hold the different silverware because they're available in most stores and are very affordable to use. Then, you could line them up in the middle of a basket, wire bin, or wooden box! And the spaces on either side of the jars can then be used for the plates and napkins.
I can't get over how well this caddy turned out and I just love the pop of color that it brings to our patio area! I'm so excited to put this space to good use in the coming months. It has definitely come a long way since we moved last year, and I'm happy to say that it's almost fully functional!
If you want to see another project we've been working on since we moved in, click here to read about how we regrow veggies in our garden.
And if you are looking for another DIY tutorial related to outdoor entertaining, click here to find out how Lora created this adorable outdoor serving bar!

Jolene is a wife, DIY addict & cat lover who writes from her home in Los Angeles. She adores everything historical & vintage, and could happily wander through a used book store for hours without even buying anything. Grab a cup of tea & feel free to visit her blog, which features unique home decor ideas, DIY project tutorials, and tips on budget living.